

In this post I explain how to prepare Hand Knitting Yarns for use on a home knitting machine using a Yarn Winder, also known as a Ball Winder.


Some machine knitters do not realize that yarn sold in either a Ball or Skein format must be rewound into what is commonly known as a "Centre Pull Ball" or a "Cake".

Cake? Yes, cake. After rewinding, the new shape looks like little cakes of yarn. But why rewind a ball of yarn you ask?

Home knitting machines with a Tension Mast are designed to have the yarn flow as smoothly as possible so the carriage can form stitches to the correct size/tension. It impedes your productivity if you have to constantly stop and pull great lengths of yarn, just to work a few rows.
Remember: 1 row of Stocking Stitch on a home knitting machine uses 3 times the width of the working needles measured in yarn. Twice that for Double Bed stitches.

Note: This is especially important as our knitting machines will draw the yarn at a very fast rate. If the yarn does not flow smooth your carriage will be labouring to knit a row due to the lack of yarn flow. This puts unnecessary strain on the knitting machine carriage as you try to knit a row. "Why is the carriage so hard to push across?" Because you haven't prepared your yarn correctly!
So please: NEVER EVER KNIT DIRECTLY FROM A BALL OF HAND KNITTING YARN! Always wind it first using a Yarn Winder.

Also, by rewinding the yarn you get a feel for the fibre you have chosen and have the opportunity to examine the yarn for any knots, loops or other flaws as it moves through your fingers during the winding process.

Once rewound the yarn can be drawn from the centre of the new ball, threaded into your machine and it will flow smoothly and not move around on you.

Note: Hand knitting yarns can also be wound into another variation called a "Mini Cone" of Yarn. You wind these in a similar manner as Centre Pull balls, but the yarn feeds from the outside instead, like larger Cones of yarn. I show you how to wind Mini Cones further along in this post.


Hand Knitting Yarn Formats and Winding Methods
Hand knitting yarns are now commonly sold in three formats:
Balls:

and an *oblong shape ball . . .

These "Ball" formats are generally sold in two standard weights:
- 50 gram or 1.75oz sizes and 100 gram or 3.5oz sizes.

How To Wind A Centre Pull Ball:
The Yarn Winder is clamped to a desk or table.
Now take your ball of hand knitting yarn, remove any labels and insert your fingers into the centre of the ball and find the yarn tail tucked somewhere inside. Take your time as you don't want to make any knots.
Draw the yarn from the inside of the ball of yarn as shown.

You will thread this end into the yarn winder. There is a metal yarn guide that swings out into a locking position, away from the winder. This is where you thread the yarn.

You feed the yarn through the guide toward the winder, through the small feeding eyelet (hole) and then clip the yarn end to the top of the cone.


Next, place the ball of yarn on the table or, since you will be winding at a fairly fast speed, I put the ball of yarn in a basket, on the floor. If the ball of yarn bounces around, it won't get tangled and run across the room.

Hold the yarn coming from the ball in one hand, letting it run between your Thumb and Forefinger, to create a slight amount of tension and with your other hand, slowly turn the handle away from you.


This way you will wind and more uniform ball. You learn to finesse this part as you wind different fibres.
The cone will rotate, drawing the yarn from the ball, through your fingers, onto the Winder, creating a Centre Pull Ball of Yarn.

Once you have finished winding the new ball, release the yarn end clipped to the top of the cone and slowly lift the yarn cake off the winder.


Now you can place the yarn cake under your knitting machine Yarn Guide and thread it with your new fibre to sample and work with.


SKEINS:
The next common format for hand knitting yarn is a 'Skein':

This format has the yarn wound in long loops, tied together at one or multiple intervals and then braided to keep the yarn strands from tangling when being handled.

This use to be the yarn industry standard for the way yarn was sold, before the invention of ball winding machines. It's has returned in popularity as the Skein format shows off the beauty of yarns, hand-dyed yarns in particular.

Tip: Looking at the actual fibres in a Skein of yarn does not represent what the yarn will look like knit up, and the difference can sometimes be very drastic. Buyer beware.

Skeins today are generally put up in 100g formats. The actual number of metres/yards you receive depends on thickness/gauge of the yarn.

*Note: There is another put up of yarn known as a 'Hank'.

*Note: There is another put up of yarn known as a 'Hank'.
Some yarn companies wind huge quantities of yarn, massive balls or skeins of yarn, anywhere from 250g/8oz size balls to massive 24oz / 980 yard skeins like Prism Big Ball Mohair. This is enough yarn in one quantity to make a complete garment.


*Note: This yarn format labelling seems to be open to debate. I've received interesting (slow day at the office?) comments from knitters around the world about my calling a Skein a Hank and so forth. There are regional differences; you and your friends or countryfolk may call a tomato a 'tamawtoe'. Call it what you may. It's just a whole lotta yarn! It's what you do with it that's important!

New Knitters ~ Very Important: A skein or hank must be prepared before knitting by winding it into a Centre Pull Ball or Mini Cone. Why? If you don't prepare the yarn first you will end up with a tangled mess. Your machine draws the yarn too fast for it to be used this way.
The preferred method is to use a Swift and Ball Winder in tandem. Let me show you how.
How To Wind Skeins Using A Yarn Swift and Winder:
This is how I wound the "Cruise" by Twinkle/Classic Elite, a Silk/Cotton blend . . .


Both Swifts and Yarn Winders are available at most local yarn shops, and also online via knitting machine dealers and online auctions such as ebay and Craigslist. Let me show you some common models available.
Yarn Winder Models I Don't Like:
Superba/Passap Cone Winders:

First I'm going to show the Cone Winders that come with Superba Knitting Machines. Pictured above is the familair cone + collar that should wind a cone of yarn like that from a yarn mill. I do not like these and do not recommend their use. Why? There are no yarn guides on this cone winder and you must use your hands to slide the yarn back and forth across the cone. The tension on the yarn as you wind is hard to maintain and therefore the resulting yarn is uneven and it will pull off the cone in great clumps and tangle like crazy.
Yarn Winders I do like and recommend . . .

The Royal Yarn Winder pictured above is probably the most popular Yarn Winder worlwide. They've been produced for over 35 years and do an excellent job and wind quite a lot of yarn.
Not as widely available but that works on a similar format is the Silver Reed brand ball winder pictured below, which operates in the same manner. I have one of these as well.

These Wool Winders are great little work horses and last a long time. Remember: they are meant for home use - not industrial. Work them beyond the stresses they were designed to handle and you will end up breaking and stripping the gears inside.
Also, there are bigger models available that hold more yarn based on the Royal and Silver Reed Wool Winders.

This model also handles Lace weight hand knitting yarns great.

This Silver Reed model comes with 3 plastic cones on which yarn is wound and then can be removed.

These are very, very handy, especially for large quantities of yarn as you can see in these photos.
Pictured is Blue Heron 'Egyptian Mercerized Cotton', a hand dyed cotton that comes in a hank 930 yards long. I can get all this yardage onto one cone. The yarn does not collapse or tangle. It holds it's shape under tension just great.

Below are two colours of 'Socks That Rock' Lightweight Sock Yarn. 360y/329m per cone. That's one pair of socks per colour, per cone. This makes project planning and preparation easy.

What is not easy is to source extra cones for this model. So I started using old Paper Towel tubes to create my own "Mini Cones" of Yarn.
Mini Cones of Yarn
When you are preparing your hand knitting yarn for a garment, you want to wind all 10 balls at once, not stop and start with winding and knitting.
The average garment for me (I'm a size XL) using 50g balls of yarn, like the Zara below, is 15 with 1 ball for a Gauge Swatch.


I just cut an old paper towel tube to length, trimmed, taped and got winding. Presto! Mini Cones that feed smoothly and fast into my machine.

A ball winder is handy for all styles of yarn: especially for that coned yarn you bought at such a great deal on eBay, only to find that it's way too thin for your gauge of machine. You can wind off yarn strands of yarn as many times as you like, then rewind them together, doubling and tripling the thickness.

Tip: Once I started making Mini Cones of Yarn I never wind "Centre Pull" balls for machine knitting anymore. Why? Because without the support of the paper sleeve, once the yarn is removed from the central cone of the wool winder, the yarn will compress towards the centre and the first 10-20 rows of your knitting will be very tight to work due to the extra pressure. You can see this "compression" in the photo below.

This pressure means the yarn will be under very tight tension at first and you will find you will have to pull several lengths of yarn from the centre of the ball before knitting, then work a few rows and then stop and pull some more and what a waste of time! Never mind making for inconsistent tension and stitch formation.

The Mini Cone is my preferred method as it allows for the yarn to be drawn off from the outside rather the inside, just like coned yarn. Let me show you how to wind a mini cone of yarn.
How To Wind "Mini Cones" of Yarn.
I'll show you two examples. The first using the Royal brand Wool Winder which is probably the most popular style sold world-wide, and a second example using a trickier yarn - Lace Weight Mohair - and using the Silver Reed Cone Winder.

Prepare A Paper Sleeve.
The plastic centre column on the Royal Ball Winder is removable in the event your yarn gets tangled somehow in the process. Some knitters think you can purchase more of these and wind your yarn directly onto the centre column, but they are not widely available. Instead I suggest you recycle common paper cardboard tubes that paper towel comes on.

Begin by pre-cutting some tape into 2" pieces. . .

Now select a left over paper tube to use - I recycle and keep a bag next to my knitting machine and save smaller sections for late use . . .
Cut a cardboard tube in half lengthwise . . .

Slip this over the centre column . . .

Trim this sleeve to the proper height by making a notch in the paper at the top edge of the column with your scissors . . .

Remove the paper sleeve and trim off excess . . .

Slip the trimmed down sleeve back onto the centre column and overlap edges . . .

and then tape this together as firmly as possible. You don't want it too loose or this sleeve will flop about and not remain stationary as you wind . . .

Now you are ready to wind a Mini Cone of Yarn.
To Wind:
Thread the yarn tail coming from the ball or skein through the metal guide on the Ball Winder towards the centre column . . .

Slip the yarn tail over and across the top of the centre column and fasten to the slots in the top of the column. Do not leave too long of a yarn tail dangling.

In one lightly hand hold the yarn coming from the ball, skein or Swift so it flows freely through your fingers with the lightest amount of pressure. You will use this hand to keep the yarn under tension and to check for knots or tangles.

Use the other hand to turn the Yarn Winder handle clockwise, which will rotate the centre column and the yarn will wind itself around the paper sleeve into a uniform, tidy format.


Don't wind too fast as you might cause the yarn to fly off and onto the floor.

When the Mini Cone is complete carefully pull up on the paper sleeve, lifting the newly formed Mini Cone off the winder.


Tip: For white yarns or in the event the base of the newly wound Mini Cone is not stable, you can insert it over and onto an old cone used for commercial yarn.


Then thread your knitting machine as normal and commence knitting.

I use this format for all hand knitting yarns. For the project "main yarn" and the "contrast" colour or waste yarn.


Winding Mohair and Other Delicate, Tricky Fibres.
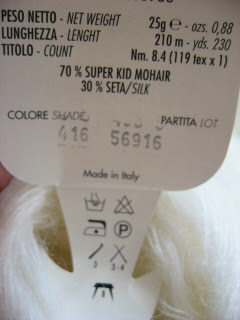
For some yarns like Lace Weight Mohair, slippery fibres like Silk, Rayon, my favourite yarn winder to use is the Silver Reed Yarn Winder with the Expanding Feeder Arm I'm using in this photo demo.
This model has a spring loaded arm with rollers that apply pressure on the yarn as it is wound keeping it uniform in size and tension. As you wind yarn, the width of the ball will expand and the feeding arm moves with it. This is great for tricky fibres like silks and rayons that are slippery and don't want to behave. This winds a large dense cake of yarn.
If I am winding White or another light coloured yarn, I take a dusting cloth a clean the winder. This is so you don't end up with a line of black lint from the last yarn you wound in the middle of your knitting.

Just like with the other model of yarn winder, I take a leftover paper towel tube and cut it the height of the "cone" on the winder.

and cut the tube in half...
then slip the paper sleeve over the winder cone. . .

Note: The shape of the cone on this Yarn Winder is slightly different, but just overlap the paper sleeve as snug as possible and tape it several times in place. The paper may not overlap at the bottom but don't fret. It will hold.


The yarn winder with paper sleeve is ready to go.

Now take your ball of hand knitting yarn, remove any labels and insert your fingers into the centre of the ball and find the yarn tail tucked somewhere inside. Take your time as you don't want to make any knots.
Do not wind from the outside of the ball. The yarn will not flow freely and will be a pain to wind. Draw the yarn from the inside of the ball of yarn as shown.


To thread this model I thread right to left, beginning with the wire eyelet guide (in blue), across the roller (in red) and then towards the cone (following purple arrow).

Holding the roller away from the cone, I wrap the yarn counter clockwise around the cone a few times.

Now release the roller and it will press up against the cone.

Lay the yarn across the rollers and then take up the slack on the yarn in front of the wire guide. Note how I am holding the yarn between my fingers in this photo.

As you begin winding you want to apply just the slightest amount of tension using your fingers so that the yarn will wind consistently and not produce a ball of yarn that is too loose and sloppy.
Also, you will feel for any knots or snags in the yarn so that you may fix them at this point and not knit them into your garment. Remember - No Knots In Knitting!

Have your ball of hand knitting yarn directly in front of the winder and do not wind too fast, especially when working with Mohair or you can have a knotted mess in no time fast.

As the ball of yarn diminishes in size, keep an eye on it so it doesn't suddenly bunch up on you.

Do not be tempted to wind too fast or you will be sorry! Mohair loves to tangle and lockup like Velcro.

When you approach the end of the ball of hand knitting yarn, stop winding and insert your fore finger and middle finger into the centre of the ball and fold your fingers over the strands and grip these lightly using your thumb . . .

Make sure you place your thumb on top of where the yarn winds over on itself and apply a light pressure by pinching . . .

Resume winding slowly and let the strands unwind through your fingers. This will prevent these last few metres of yarn from tangling. . .


Go slowly and eventually the yarn will run out and you are done winding.


Remove the new ball from the winder by pulling on the paper tube - not the yarn.

Voila! A Mini Cone of Yarn. Even with tricky fibres like Mohair.

Waxing Yarns: You will notice that I did not use any kind of wax on my yarn. It is common for machine knitters to run the strand of yarn through a block of Parafin Wax when winding to make the fibre flow through and knit on the machine easier. This is suggested for Cotton, Linen and Mohair.
I said it before and I'll say it again. I do not wax my yarns.
Most coned commercial yarns have a light wax layer or oil applied at the mill in the finishing stages, that comes out with washing in detergent. It depends on the fibre and the mill.
I've already tested this yarn so I know at the time of writing that it is not necessary. My Superba knitting machine works Mohair and other brushed fibres just fine as they are. A feature due to the shape and size of the Flow Combs.
I don't like coating these beautiful fibres with additional layers of a petrol chemical that can clump and may or may not wash out. If the yarn won't knit on my machine the way it is, it will on two needles by hand.

Mission accomplished. Ready to work.


I hope you found this information helpful and I wish you happy knitting.
Patrick Madden.
Toronto, Ontario CANADA
superbaknitting@gmail.com ©Patrick Madden 2004-2010.
Superba Knitting™ is a trademark of Patrick Madden.
The preferred method is to use a Swift and Ball Winder in tandem. Let me show you how.
How To Wind Skeins Using A Yarn Swift and Winder:
This is how I wound the "Cruise" by Twinkle/Classic Elite, a Silk/Cotton blend . . .
This particular brand of hand knitting yarn looks like it is wound in a standard "ball" format when you see it in the store but when you open it up you find it's actually a Skein.


If you tried knitting with the yarn like this it would end up in a tangled mess in seconds. Do not attempt.
Skeins come in many formats, some displayed braided:


Some Skeins you will see opened up to show their lovely textures and colours.

Regardless, when winding we use what is called a 'Swift' to hold open the Skein under tension, allowing us to wind off the yarn in an even manner.
Swifts come either made using metal covered with plastic, or wood. Below is a model made from White Birch.

To use the swift you open it up similar to an umbrella part way to be able to slip the skein of yarn over the wooden struts. The stopper at the bottom tightens with a wooden knob against the centre pole.

I usually help the process by lightly pulling on the skein as I raise the "umbrella" up by raising the stopper at the base of the umbrella section. As it expands I release my grip on the yarn as it becomes tensioned by the Swift.

Once the yarn is secured in place I tighten the locking screw at the base of the Swift and then I clip any securing threads tied around the skein of yarn that hold the skein together.
Depending on the yarn, there can be anywhere from one to 4 of these ties. Examine the Skein carefully to ensure you have undone them all.

The yarn ends of the Skein will be secured to one of these "ties". Choose one end to feed into the Ball Winder, and tuck the opposite yarn end out of the way.
Once the yarn is tensioned on the Swift and ready to unreel, I can commence winding a mini cone of yarn using a Ball Winder.


Tip: With slick yarns like Rayon, Silk and even Alpaca, do not get carried away and wind too fast. Otherwise the new yarn ball may pop off and launch across the room.


Both Swifts and Yarn Winders are available at most local yarn shops, and also online via knitting machine dealers and online auctions such as ebay and Craigslist. Let me show you some common models available.
Yarn Winder Models I Don't Like:
Superba/Passap Cone Winders:
First I'm going to show the Cone Winders that come with Superba Knitting Machines. Pictured above is the familair cone + collar that should wind a cone of yarn like that from a yarn mill. I do not like these and do not recommend their use. Why? There are no yarn guides on this cone winder and you must use your hands to slide the yarn back and forth across the cone. The tension on the yarn as you wind is hard to maintain and therefore the resulting yarn is uneven and it will pull off the cone in great clumps and tangle like crazy.
Yarn Winders I do like and recommend . . .
Royal Yarn Winder
The Royal Yarn Winder pictured above is probably the most popular Yarn Winder worlwide. They've been produced for over 35 years and do an excellent job and wind quite a lot of yarn.
Not as widely available but that works on a similar format is the Silver Reed brand ball winder pictured below, which operates in the same manner. I have one of these as well.
These Wool Winders are great little work horses and last a long time. Remember: they are meant for home use - not industrial. Work them beyond the stresses they were designed to handle and you will end up breaking and stripping the gears inside.
Also, there are bigger models available that hold more yarn based on the Royal and Silver Reed Wool Winders.
Silver Reed Roller Yarn Winder Model With Removable Cones
Silver Reed also makes a wonderful model of Wool Winder that has an expandable metal yarn guide arm. Combined with the rollers that press against the cone during winding, this is the best model for tricky fibres like Silks, Rayon, Bamboo, Mohair.
Silver Reed also makes a wonderful model of Wool Winder that has an expandable metal yarn guide arm. Combined with the rollers that press against the cone during winding, this is the best model for tricky fibres like Silks, Rayon, Bamboo, Mohair.

This model also handles Lace weight hand knitting yarns great.

This Silver Reed model comes with 3 plastic cones on which yarn is wound and then can be removed.

These are very, very handy, especially for large quantities of yarn as you can see in these photos.
Pictured is Blue Heron 'Egyptian Mercerized Cotton', a hand dyed cotton that comes in a hank 930 yards long. I can get all this yardage onto one cone. The yarn does not collapse or tangle. It holds it's shape under tension just great.

Below are two colours of 'Socks That Rock' Lightweight Sock Yarn. 360y/329m per cone. That's one pair of socks per colour, per cone. This makes project planning and preparation easy.

What is not easy is to source extra cones for this model. So I started using old Paper Towel tubes to create my own "Mini Cones" of Yarn.
Mini Cones of Yarn
When you are preparing your hand knitting yarn for a garment, you want to wind all 10 balls at once, not stop and start with winding and knitting.
The average garment for me (I'm a size XL) using 50g balls of yarn, like the Zara below, is 15 with 1 ball for a Gauge Swatch.

It was for this reason I was inspired to make my own Mini Cones using left over Paper Towel tubes. Using this method I had no limitations to the number of cones I could wind at any given time.
I just cut an old paper towel tube to length, trimmed, taped and got winding. Presto! Mini Cones that feed smoothly and fast into my machine.

A ball winder is handy for all styles of yarn: especially for that coned yarn you bought at such a great deal on eBay, only to find that it's way too thin for your gauge of machine. You can wind off yarn strands of yarn as many times as you like, then rewind them together, doubling and tripling the thickness.

Tip: Once I started making Mini Cones of Yarn I never wind "Centre Pull" balls for machine knitting anymore. Why? Because without the support of the paper sleeve, once the yarn is removed from the central cone of the wool winder, the yarn will compress towards the centre and the first 10-20 rows of your knitting will be very tight to work due to the extra pressure. You can see this "compression" in the photo below.

This pressure means the yarn will be under very tight tension at first and you will find you will have to pull several lengths of yarn from the centre of the ball before knitting, then work a few rows and then stop and pull some more and what a waste of time! Never mind making for inconsistent tension and stitch formation.

The Mini Cone is my preferred method as it allows for the yarn to be drawn off from the outside rather the inside, just like coned yarn. Let me show you how to wind a mini cone of yarn.
How To Wind "Mini Cones" of Yarn.
I'll show you two examples. The first using the Royal brand Wool Winder which is probably the most popular style sold world-wide, and a second example using a trickier yarn - Lace Weight Mohair - and using the Silver Reed Cone Winder.

Prepare A Paper Sleeve.
The plastic centre column on the Royal Ball Winder is removable in the event your yarn gets tangled somehow in the process. Some knitters think you can purchase more of these and wind your yarn directly onto the centre column, but they are not widely available. Instead I suggest you recycle common paper cardboard tubes that paper towel comes on.

Begin by pre-cutting some tape into 2" pieces. . .

Now select a left over paper tube to use - I recycle and keep a bag next to my knitting machine and save smaller sections for late use . . .

Cut a cardboard tube in half lengthwise . . .

Slip this over the centre column . . .

Trim this sleeve to the proper height by making a notch in the paper at the top edge of the column with your scissors . . .

Remove the paper sleeve and trim off excess . . .

Slip the trimmed down sleeve back onto the centre column and overlap edges . . .

and then tape this together as firmly as possible. You don't want it too loose or this sleeve will flop about and not remain stationary as you wind . . .

Now you are ready to wind a Mini Cone of Yarn.
To Wind:
Thread the yarn tail coming from the ball or skein through the metal guide on the Ball Winder towards the centre column . . .

Slip the yarn tail over and across the top of the centre column and fasten to the slots in the top of the column. Do not leave too long of a yarn tail dangling.

In one lightly hand hold the yarn coming from the ball, skein or Swift so it flows freely through your fingers with the lightest amount of pressure. You will use this hand to keep the yarn under tension and to check for knots or tangles.

Use the other hand to turn the Yarn Winder handle clockwise, which will rotate the centre column and the yarn will wind itself around the paper sleeve into a uniform, tidy format.


Don't wind too fast as you might cause the yarn to fly off and onto the floor.

When the Mini Cone is complete carefully pull up on the paper sleeve, lifting the newly formed Mini Cone off the winder.


Tip: For white yarns or in the event the base of the newly wound Mini Cone is not stable, you can insert it over and onto an old cone used for commercial yarn.


Then thread your knitting machine as normal and commence knitting.

I use this format for all hand knitting yarns. For the project "main yarn" and the "contrast" colour or waste yarn.


Winding Mohair and Other Delicate, Tricky Fibres.
For some yarns like Lace Weight Mohair, slippery fibres like Silk, Rayon, my favourite yarn winder to use is the Silver Reed Yarn Winder with the Expanding Feeder Arm I'm using in this photo demo.
This model has a spring loaded arm with rollers that apply pressure on the yarn as it is wound keeping it uniform in size and tension. As you wind yarn, the width of the ball will expand and the feeding arm moves with it. This is great for tricky fibres like silks and rayons that are slippery and don't want to behave. This winds a large dense cake of yarn.
If I am winding White or another light coloured yarn, I take a dusting cloth a clean the winder. This is so you don't end up with a line of black lint from the last yarn you wound in the middle of your knitting.
Just like with the other model of yarn winder, I take a leftover paper towel tube and cut it the height of the "cone" on the winder.

and cut the tube in half...
then slip the paper sleeve over the winder cone. . .

Note: The shape of the cone on this Yarn Winder is slightly different, but just overlap the paper sleeve as snug as possible and tape it several times in place. The paper may not overlap at the bottom but don't fret. It will hold.


The yarn winder with paper sleeve is ready to go.

Now take your ball of hand knitting yarn, remove any labels and insert your fingers into the centre of the ball and find the yarn tail tucked somewhere inside. Take your time as you don't want to make any knots.
Do not wind from the outside of the ball. The yarn will not flow freely and will be a pain to wind. Draw the yarn from the inside of the ball of yarn as shown.


To thread this model I thread right to left, beginning with the wire eyelet guide (in blue), across the roller (in red) and then towards the cone (following purple arrow).
Holding the roller away from the cone, I wrap the yarn counter clockwise around the cone a few times.

Now release the roller and it will press up against the cone.

Lay the yarn across the rollers and then take up the slack on the yarn in front of the wire guide. Note how I am holding the yarn between my fingers in this photo.

As you begin winding you want to apply just the slightest amount of tension using your fingers so that the yarn will wind consistently and not produce a ball of yarn that is too loose and sloppy.
Also, you will feel for any knots or snags in the yarn so that you may fix them at this point and not knit them into your garment. Remember - No Knots In Knitting!

Have your ball of hand knitting yarn directly in front of the winder and do not wind too fast, especially when working with Mohair or you can have a knotted mess in no time fast.

As the ball of yarn diminishes in size, keep an eye on it so it doesn't suddenly bunch up on you.

Do not be tempted to wind too fast or you will be sorry! Mohair loves to tangle and lockup like Velcro.

When you approach the end of the ball of hand knitting yarn, stop winding and insert your fore finger and middle finger into the centre of the ball and fold your fingers over the strands and grip these lightly using your thumb . . .

Make sure you place your thumb on top of where the yarn winds over on itself and apply a light pressure by pinching . . .

Resume winding slowly and let the strands unwind through your fingers. This will prevent these last few metres of yarn from tangling. . .


Go slowly and eventually the yarn will run out and you are done winding.


Remove the new ball from the winder by pulling on the paper tube - not the yarn.

Voila! A Mini Cone of Yarn. Even with tricky fibres like Mohair.

Waxing Yarns: You will notice that I did not use any kind of wax on my yarn. It is common for machine knitters to run the strand of yarn through a block of Parafin Wax when winding to make the fibre flow through and knit on the machine easier. This is suggested for Cotton, Linen and Mohair.
I said it before and I'll say it again. I do not wax my yarns.
Most coned commercial yarns have a light wax layer or oil applied at the mill in the finishing stages, that comes out with washing in detergent. It depends on the fibre and the mill.
I've already tested this yarn so I know at the time of writing that it is not necessary. My Superba knitting machine works Mohair and other brushed fibres just fine as they are. A feature due to the shape and size of the Flow Combs.
I don't like coating these beautiful fibres with additional layers of a petrol chemical that can clump and may or may not wash out. If the yarn won't knit on my machine the way it is, it will on two needles by hand.

Mission accomplished. Ready to work.


I hope you found this information helpful and I wish you happy knitting.
Patrick Madden.
Toronto, Ontario CANADA
superbaknitting@gmail.com ©Patrick Madden 2004-2010.
Superba Knitting™ is a trademark of Patrick Madden.


