
What I don't have is the time to edit and rewrite all this.
I had pulled this post from the internet because I was not happy with layout but I'm putting it back up to provide some information, until I make the time to rewrite this.
Patrick/2011.


S.I.T./Groupe SUPERBA of Mulhouse, France produced two models of table top Motor Drive accessories for home knitting machines.
These Motor Drive models were sold world-wide under the brand names SUPERBA, and under the name SINGER throughout Europe, PHILDAR in France and the WHITE brand in North America.
Motor Drives are no longer produced but you do see them for sale on eBay and other online auctions. Motor Drives are more common in Europe than in North America.

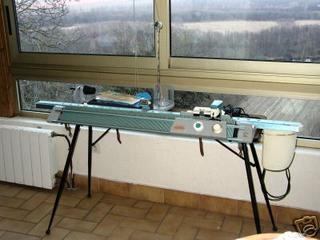
The first table top Motor Drive, model 1460, positioned the motor at the far right of the machine and it was suspended over the edge of the table or stand.

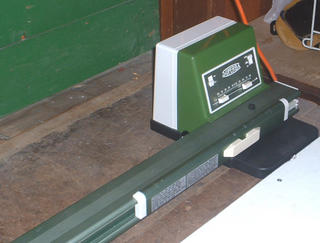
Their next model developed was a table top motor, known as the EMS-4 or 1480 which saw an improvement in the way the carriage connected to the drive arm, a new design for the drive belt and most importantly, one can set the course width (how wide the motor moves the carriage across the needle bed) directly on the control panel of the motor drive.

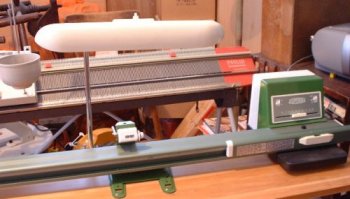
The Motor was repositioned to sit on top of the stand with new, easily accessible controls for course width and speed. The EMS-4 is the model I own and is the focus of this post.
VERY IMPORTANT
North American Power Requirements:
If you live in North America and you have purchased a SUPERBA, SINGER or PHILDAR brand Motor Drive, please be advised that you must also purchase a Step Up & Down Transformer to operate the Motor here in North America. Why?

The Motor Drive Units exported by S.I.T./Superba were wired for use in Europe, and come with what is known as a European Euro 2-Pin "C" Plug.

These Plugs will not fit into your wall socket here in Canada, The United States or Mexico. The shape is wrong.
Also, European electrical home appliances are wired to operate at 220-240 Voltage, and here in North America, our home wall outlets, apart from those for our Clothes Dryer, Electric Stove and Furnace, provide only 110-120 Volts, which is not enough to operate these Motors meant for use in Europe.

To use these Motor Drives, you will have to invest in a Step Up & Down Transformer, which will ramp up our 110-120V electric current to the required 220-240V the Motors need to operate.
Step Up & Down Transformer
These units plug into our standard wall sockets and once turned on, will step up our North American 110 Voltage to the European 220 Volts that is required to operate the Motor Drive.

Transformers are sold in various "sizes" of Watts, in a huge range. For the purpose of providing enough power to operate a Motor Drive, you would need a Transformer in the range of 500 Watts up to 1000 Watts.
Most of the Motor Drives available here in North America are wired for the European 220V. I did not know upon receiving my Motor Drive that this meant the purchase of a step-up transformer to run at 110V. And not the travel size for your hair dryer either, but a big, heavy duty unit that cost $100 Canadian. That's not to say you cannot find step-up transformers for less but that was the only available price point at the time. Buyer beware!

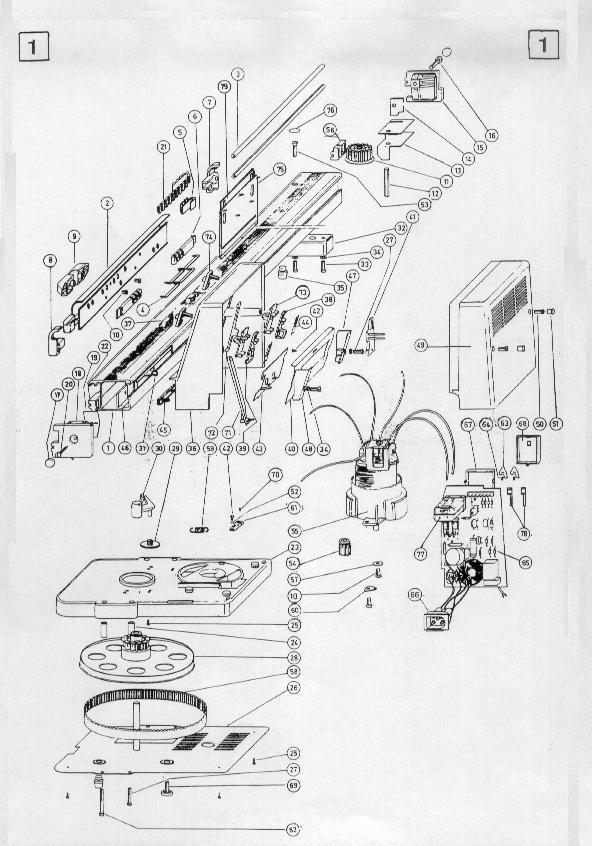
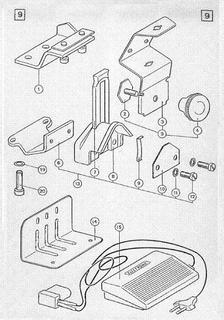
Below is a Parts Schematic for the EMS-4 Motor. If needing repair, please bring your Motor to a qualified repair person. Your local sewing machine repair shop is a good idea as the number of parts are numerous and your household "Mr. Fixit" could end up doing more damage than good if not experienced in small motor repair.
Modifying Your Knitting Machine
For Use With The Motor Drive
 This is a set of Alan Keys. These are essential to the following modifications you must make to the Knitting Machine and the Back Bed Carriage before attaching your Motor Drive. I was lucky that when I purchased my second hand S-48 machine it had already been modified for use with the motor.
 The knitting machine needs to have the foot pads it was shipped with replaced with the set that come with the Motor Drive, shown in above schematic - top left. You will take the rubber pads off the set you're replacing and attach to the new pair.
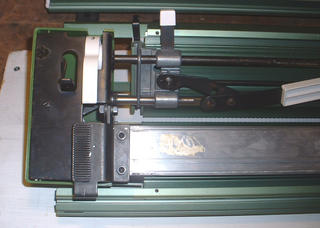

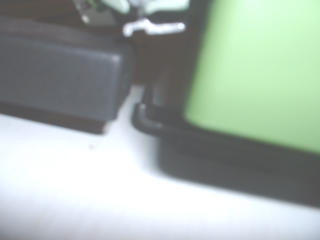
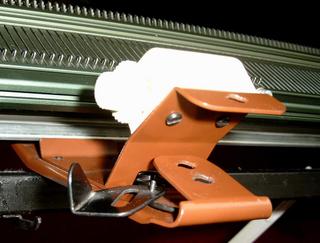
This new pair (shown above left and right) are broader than the original and have an extension toward the back of the machine with a hook on them (see photo below) which allows the Motor Drive to attach to the machine base. You will use the appropriate size Alan Key to replace these.
Once the foot pads are changed you can clamp your Knitting Machine to your table or stand.

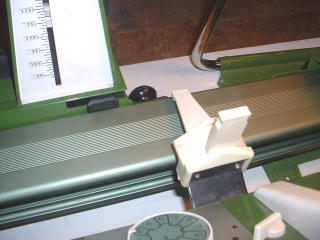
The next step is to attach the Connecting Arm for the Motor Drive to the Knitting Machine Back Bed Carriage. When completed it will look like this:

Pictured below are two photos of a Back Bed Carriage with the standard tripping arm attached. Remove this as shown in the schematic by using the Alan Key to remove these screws.


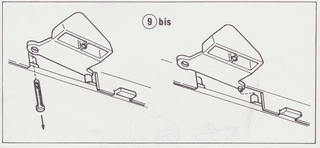
Now attach the Motor Drive bracket to the carriage and the plastic connecting arm pieces as per the schematic and the photos I've included. The long triangular extension shown in the first schematic is the tripping arm for the Forma Charting Accessory. Attach this piece as well if you intend to use this accessory.


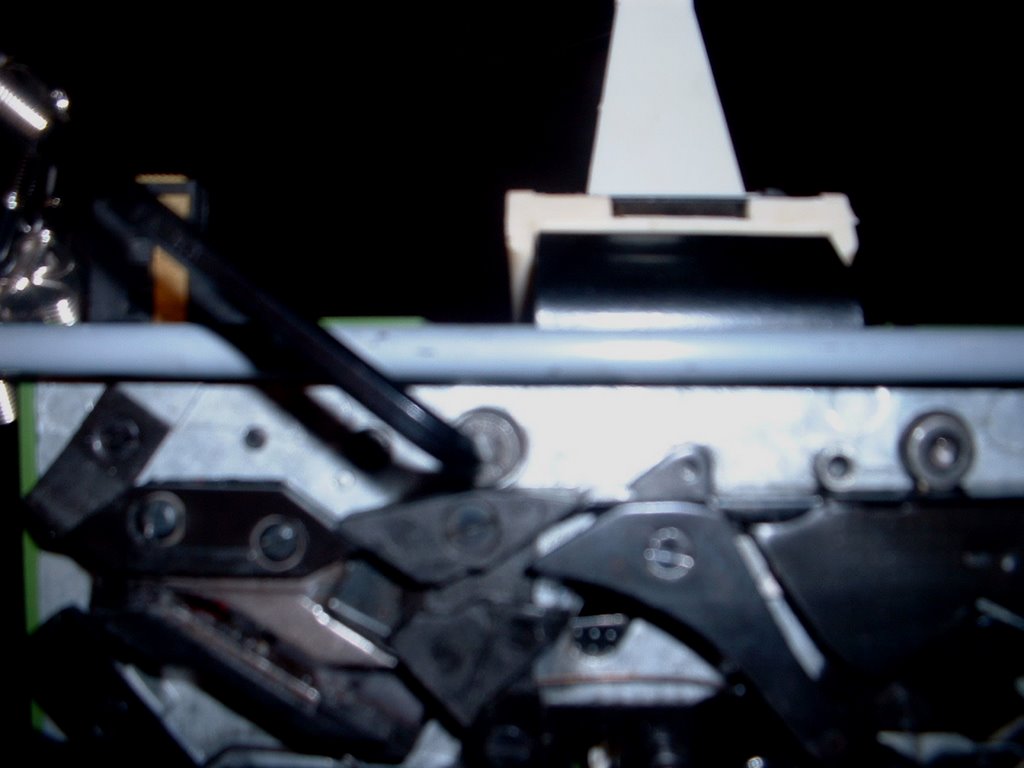
Now move your Cursor on the back bed of the Knitting Machine to the far left and lock it into position with both Cursor Blocks in place.

TIP: Please remember to keep all tools and yarn away from this section of the knitting machine. The Cursor slides along the rail shown and is attached to the Cursor Belt. Electrical signals must pass through this unimpeded. Always lock your cursor to the side when not being used for an electronic stitch pattern.
CONNECTING THE MOTOR DRIVE
TO THE KNITTING MACHINE
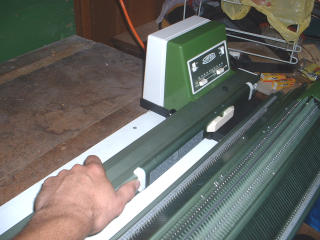
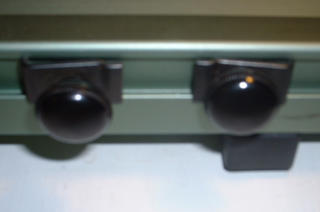
Once the modifications are completed to the knitting machine and it has been clamped to your table or stand I recommend you take a moment and turn your Motor Drive over so you can examine it's underside.TO THE KNITTING MACHINE
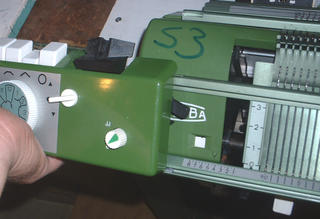
I want you to see the underside of the Motor Drive base so you can appreciate how compact this unit is and to make note of the Base Level that is to be found directly under the Motor on the right side. This allows you to balance the Motor Drive in case of an uneven table surface. Sometimes when the accessories are attached they can cause a bit of an imbalance to the weight along the belt track.

On the base of the Motor at the front edge is a slot which slips over the hook on the right end of the knitting machine. There is also an air vent on the bottom of the base and this needs to be kept free of lint and dust.

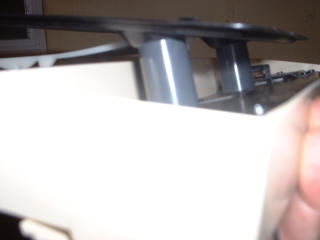
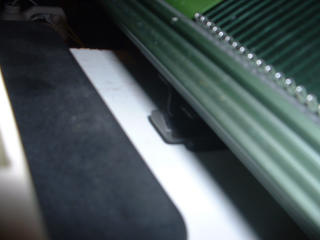 This photo shows the base of the left end of the Motor Drive. This slips over the hook on the left side of the knitting machine.

Ensure the Motor Drive is securely attached to the Knitting Machine frame before proceeding.
ATTACHING ACCESSORIES TO THE MOTOR DRIVE
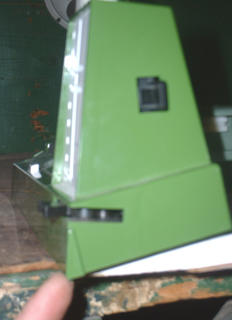
On the back of the Motor Drive frame are two (2) distinct clamps.

A single clamp a hexagon shape washer that slides along the positioning slot on the back of the Motor Drive. This is for attaching the Yarn Mast/Row Counter and the Lamp unit.
Note: For persons attaching a Digi Form accessory, there will be another single clamp like this packaged with this accessory for attaching it to the Motor Drive.

The second style of clamp is a pair with rectangular metal brackets which are for attaching the Forma Charting Accessory.
• YARN MAST + ROW COUNTER

You must remove the row counter from the bracket it was originally attached too by removing the screws on the back and attaching the counter to the bracket for the Motor Drive - shown below in the schematic - on top right.

Once the row counter is attached you can mount the bracket on the Motor Drive and tighten.


Take the Yarn Mast itself and insert the top end (the locking notches are about 1" down from the end) into the Yarn Tension Guide. Ensure this is inserted fully or the yarn guide will swing around.


Insert the yarn mast into the Motor Drive bracket and secure.


Attach the plastic yarn guide to the mast and Voila! You are ready to thread your machine.


 THE LAMP
If you wanted to secure your Lamp to the Motor Drive then it is attached along with the Yarn Mast/Row Counter as shown in the following photos:

As shown in the above schematic, the Lamp has an additional bracket that attaches it to the Motor Drive Bracket and stabilizes the unit with screws into the foot of the Lamp.


The Yarn Mast bracket goes on first, followed by the lamp and then tightened.


Insert the Yarn Mast and you are on your way.

THE FORMA 1/2 SCALE CHARTING ACCESSORY
 As mentioned in a previous post, this is my favourite charting accessory. If you see one for sale - buy it! They are a great accessory.
Depending on how you purchased your knitting machine and accessories, your Forma Charting Accessory may have the standard base plate attahed or it might be removed as the photo above shows. For use with the Motor Drive we need it removed.

If still attached to the base turn the Forma over and remove the screws from the bottom.
You will then remove the two cylinder shaped height extenders. Keep all these parts in a ziplock or container for storage.

Next you will note the grooves on the left and right side of the base of the Forma. This is where the Motor Drive clamps attach.
 The two clamps on the back of the Motor Drive with the brackets should be loosened and spread apart to the width of the Forma. Loosen the clamps to the point of almost removing them.

Rest the Forma against the back of the Motor Drive and position the clamps and lock into place.


MOTOR DRIVE & KNITTING MACHINE CARRIAGE ALIGNMENT
We are now going to attach the Front and Back Carriages to the Knitting Machine and check the clearance and alignment of the connecting arm we attached to the back carriage, either with or without the Forma Charting Accessory.

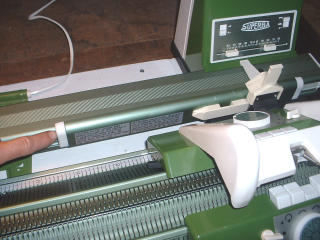
As shown in the photo below, slide the Front and Back Bed Carriages onto the left side of the knitting machine and connect these.
Before connecting the Back Carriage to the Motor Drive we want to manually verify that there is no obstruction of the Cursor, that the tripping arm is long enough to activate the row advance lever on the Forma and the row counter and that this arm passes infront of the Motor Drive controls freely.


 Once you have verified that the Back Carriage Connecting Arm moves freely and trips the appropriate levers smoothly then you may position this over the Motor Drive Arm and push down on the locking lever to lock it in place.
You may have to tap on the Motor Drive Foot Control to bring the Drive Arm in position.
DO NOT PUSH ANY NEEDLES INTO WORKING POSITION UNTIL YOU HAVE TESTED THE MOTOR DRIVE FUNCTIONS AND SET THE COURSE WIDTH AND SPEED


At this stage I would have the Motor Drive set to the slow speed and practice adjusting the width of the motor course AKA how wide of a pass the carriage will make before changing directions. Make changes to the width when the carriage is at the opposite side, ie, carrriage on Left: adjust course width on Right Side.
The course width settings on the front of the Motor Drive are simply guidelines and each machines accuaracy will be slightly different from the next. You will have to fine tune the settings to have the carriages return with not too wide of a gap between carriage and needles in working position.
Remember that the High Speed setting is for basic Jersey or Stockinette Stitch only. It is not recommended using this speed for stitches using electronic needle selection.
Enjoy your Motor Drive.
 S.I.T./Groupe Superba of Mulhouse, France produced and marketed knitting machines worldwide under various brand names, so this information applies to owners of home knitting machines that have the following names and/or logos printed on their machines:
 ® The Superba brand was distributed all over the world and the model numbers include Superba S40, S46, S47, s48, System 624, System 9000.
 ® The White brand was distributed only in North America and includes model numbers 1402, 1502, 1602.
(**Note: In North and South America, the Singer Company distributed home knitting machines produced by the Silver Reed Company of Japan - a completely different style and format of knitting machine. )
 ® Phildar is a French textile company which retailed S.I.T./Superba knitting machines in their Phildar Yarn Stores throughout France and Belgium. Models included the Phildarmatic D120, D140.