
Greetings!
In this post I take you through the steps of considering a table or stand for your Superba, Singer, White or Phildar brand knitting machine and how to attach it.
In your instruction manual you will find the following information . . .

Here are my thoughts on the subject . . .
 Let's begin by reviewing what the Knitting Machine Bed looks like and how it attaches to a table.

Your Superba Double Bed Knitting Machine is designed to sit on a table or stand with half of it's base or footprint extending over the edge of the table.

This is to allow room for the knit fabric we create to descend unobstructed from the needles.

All Superba Double Bed Knitting Machines have two Foot Pads located on the bottom of the machine bed, on which the knitting machine rests.
 Superba Knitting Machines quickly attach to any table surface by positioning the Foot Pads flush with the edge of your table or stand, and then two "C" Clamps are attached to the Foot Pads and table, securing the machine in place.

This compact, light weight design is a great feature as one can quicky set up and take down the machine as needed. Easy to oil and maintain, these machines will impress you with their ease of operation and the beautiful and varied stitches they can create.
 Table and Stand Considerations for Your Superba.
 Very Important: Make sure that the "lip" of your table or stand is deep enough for the Machine Clamps to attach to firmly. The vertical metal section of the "C" clamp must be flush with the edge of the table or stand you are attaching the machine to. Otherwise, due to inadequate surface tension, the machine will push the clamps off the table and the machine will fall off. Trust me on this!
In the photos below you can clearly see the "C" Clamps and note how the clamp is flush with the edge of the table. The clamp has to exert pressure on the Foot Pads of the knitting machine to keep it firmly in place.

 Below is a Light Scanning model Superba S48 with the Electronic Selection Box extending even further beyond the front edge of the machine frame. This additional weight was engineered to be supported by the "C" Clamps and foot pads if properly attached.
 There are many styles of stands that are available for knitting machines but the main concern is stability as you knit. You have to take into consideration:
- The length of the table surface to accommodate the knitting machine - a minimum of 39" or 1 metre. The distance between the Foot Pads is 38" or 97cm.
- All Double Bed models of Superba, Singer, White and Phildar brands are 44"/112cm in length. It's ok if the machine extends beyond the table surface.
- The depth of the table "lip" has to be deep enough so the clamp can fully grip the foot pads on the bottom of the knitting bed - atleast 1.5" or 3cm deep.
- The width of the table to accommodate the machine and the attachment of accessories.
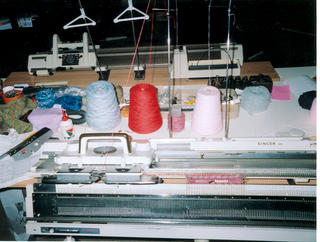
The table width is especially important when attaching optional accessories like a Motor Drive, as shown in the pictures below.
 In these two photos is the standard Machine Stand that was sold with many Superba and Singer brand machines. It had stabilizing cross brackets attached to the legs to keep the machine from swaying back and forth, which folded up under the solid wood top.

Another stand variation shown below.
 European cabinet manufacturers developed models to house knitting machines with the ability for the whole unit to fold away when not in use. It is very rare to see these cabinets for sale in North America but they are up for auction frequently on the German and French ebay sites and are still retailed in the United Kingdom.


Personal Preferences
We all have our personal preferences and if you have the space at home or work to accomodate a larger work surface then get creative and make your own or adapt a table to suit your needs.
When I received my first Superba I was not in the possession of a proper stand; meaning the table as pictured below was too wobbly for the rigors of the carriage moving back and forth.
 Also, space was a little tight for accessories and storage. I like to spread out when I knit.
 So I got creative and cleaned off a work bench in the basement which I modified with the addition of old wood shelves attached using wood screws.

 Not very pretty to look at I admit, but it did the job for the time being.
 This machine base extension also allowed room for the Motor Drive to fit behind the knitting machine and operate unobstructed, with plenty of room behind for cones of yarn, tools, accessories and a book stand.
 My next move of residence had me converting a heavy-duty banquet table to hold two machines by adding extensions. You can see my White 1602 on the left side of the table. It is mounted and clamped to an extension I had to add as the width of the table surface "lip" was too narrow to accommodate the clamps of the machine.
The machine clamps fit on only part way and the weight of the Knitting Machine caused them to POP! off, resulting in the knitting machine falling into my lap. I was lucky I was sitting there when it happened or my machine could have crashed onto the floor.
 I improvised by using leftover pieces of floor laminate. I cut the laminate to a generous length, stacked 2 pieces together to ensure they were sturdy enough to support the weight of the knitting machine and screwed them directly into the table top. I had the laminate extend to a depth of 1 1/4" to accommodate the machine clamps.
Just make sure the banquet table you choose is of solid construction with a metal frame. On it's own this table weighed quite a lot. It had a reinforced metal frame under the table and took two of us to lift. If I removed one of the machines for some reason, there was no worry of the table tipping over with another machine still clamped to the other side. Even on this table with metal legs there was great stability and enough room for yarn and accessories.
I improvised by using leftover pieces of floor laminate. I cut the laminate to a generous length, stacked 2 pieces together to ensure they were sturdy enough to support the weight of the knitting machine and screwed them directly into the table top. I had the laminate extend to a depth of 1 1/4" to accommodate the machine clamps.
Just make sure the banquet table you choose is of solid construction with a metal frame. On it's own this table weighed quite a lot. It had a reinforced metal frame under the table and took two of us to lift. If I removed one of the machines for some reason, there was no worry of the table tipping over with another machine still clamped to the other side. Even on this table with metal legs there was great stability and enough room for yarn and accessories.
 In this photo you can make out the White 1602 in the background and facing is my Silver Reed SK360 (sold as Singer in North America) with ribber. Note that the extension the White is sitting on is wide enough to accommodate the accessories that attach to the back of the knitting bed.
NOTE: If you plan to attach a Motor Drive, this is very important as the knitting machine and motor must be level.
After I acquired a second Superba machine, I began to knit on these machines more and more and my Japanese made Singer less. I also wanted more room to spread out and a work surface at a height that I could stand and work at. Pictured below is a work table I built 4 years ago out of 3/4" thick MDF Board (Medium Density Fiber Board) in 4' x 8' panels purchased at a home building store. I had them each cut in two pieces lengthwise so I could get them downstairs. I loved this table as it had a generous work surface to accommodate my White 1502 and White 1602 models as well as room for a blocking board.
 For the base of this table I improvised with whatever was around the house and ended up attaching the two panels to an old table at one end and a piece of plywood mounted on a Black and Decker Workmate Bench at the other end. This baby was SOLID. I needed some extra wood pieces to balance things out and LOTS of wood screws but there was no rocking back and forth or fear of anything tipping over.
The other benefit was that it was of a perfect height for me to stand and work at. I'm 6'2" in height and so this allowed me to work at my machines standing if I chose to or sit on a bar stool that was the perfect height for this table.
 As you can see in the photo above I had my machines on either side of the table with plenty of room in between for a fold-up cutting board which I use for blocking and steaming knits. The MDF Board was thick enough to hold the weight of my two machines and the clamps fit on perfectly.
My Current Knitting Machine Table
Pictured below is my White Model 1502 as set up in my studio for knitting. The table it is clamped to is simply a long piece of laminated cabinet board from the "As Is" section at Ikea.

The board is eight (8) feet long by three (3) feet wide and is clamped to two (2) portable Black and Decker workbenches, which are the perfect height for me as I alternate between standing and sitting while knitting on my machines.
 The chair I use is a high stool also from Ikea that places me well above the machines to easily access the carriage handles and clearly see all areas of my work. I like the space this table affords as when I am in the planning stages for either garments or classes that I teach, I like to be able to see, compare and evaluate my progress.
 This table surface is also the perfect size as it accommodates two machines clamped side by side with plenty of room for my accessories and other items directly behind.

It has plenty of storage space below for my White Easy Knitter 9mm hobby model and covered bins for extra parts, accessories and yarn. The height is perfect for working with my System 9000 Electronic Console pictured below.

I am now in possession of 5 various Superba models and I like to rotate my use of the machines. Pictured below is my Superba S48 with the Light Scanning Selection Box and Lamp attached followed by the System Knitting Machine with the 624 Controller and 4 Colour Yarn Changer set up on the same table.
 For the table I use very strong construction grade clamps, two on each end of the table and I have the unit balanced so there is no worry of this table ever tipping over. It never shifts or wobbles and can hold the weight of two Superba Knitting machines set up.
 It is also perfect as a table for my Sewing Machine and an Overlock Machine pictured below - handy for working cut & sew necklines on pullovers.


How To Attach Your Superba Double Bed Knitting Machine To A TableBegin by having your table surface ready to place the Knitting Machine on.
If you have just received a Superba ~ Singer ~ White ~ Phidlar brand Double Bed Knitting Machine or have just unpacked your machine after years in storage, please begin by unpacking your machine, parts and accessories as you come to them, being very careful not to accidentally drop something.
Your machine and accessories may be packed in the original shipping box as shown in the pictures below. These Styrofoam packing forms were meant to provide impact resistance to the machine during shipping and storage.
 Note how the Carriages are attached to the knitting machine beds in the pictures above and below. This is the way to ship and store the knitting machine and Carriages. Otherwise the Carriages can get damaged.
 Below is my Singer System Knitting Machine produced by S.I.T./Superba that I purchased from Tony Lewy in East Sussex England in the summer of 2007.

 Note in the photo above that only one carriage - The Front Carriage - is attached to the main bed. The Back Carriage was accidentally packed separately and as a result received some cosmetic damage to the Stitch Size Dial during shipping as it was not packed correctly. The machine works perfectly fine. No damage done to any electronics or other crucial areas. So if you have bought a machine, insist that the carriages be attached to the machine bed prior to packing and shipping.

The Underside of Your Superba Double Bed Knitting Machine
Before you set the machine up you will need to know the location of two parts found on the bottom of your knitting machine.
- There are Foot Pads located at each end on the bottom of the machine bed. These pads rest on the table and support the whole machine, engineered to counter balance the portion of the knitting machine extending out from the table. The Foot Pads should have a rubber padding attached, which helps to stabilize the knitting machine while in use.
Here is a photo of the modified Foot Pads for use with the Motor Drive. The metal frame of the Foot Pad has an extension to move the pad towards the centre of the machine. Shown on a Superba S48 Light Scanning model :
 The Racking Handle is a long metal bar with either a brown plastic round knob or long white handle tucked up under the machine bed. Once the machine is clamped to the table, you will then lower the Racking Handle into working position. Know it's location.
This is the bottom view of a Superba S48 Light Scanning Selection Box model left to right, with the Racking Handle outlined in turquoise:

 Next is a White 1502 Pressure Pad Progamming Model bottom view left to right:


Finally, my Singer System Knitting Machine which accepts both the 624 and 9000 Electronic Programmers, left to right: The Racking Handle is hidden behind the bubble wrap.

 If you have a Superba with an Electronic Stitch Controller, the right end of your machine is where the controller will connect to the Cursor and Back Needle Bed. Be cautious of not damaging or banging this end of the machine.


Adjust the position of the machine until each Foot Pad is aligned with the edge of your table.

 Then slip the top of the clamp onto the Foot Pad and slide the yarn clip under the table and tighten the clamps firmly but don't over do it.


To check the stability of the machine pull down on the front bed. You'll be surprised how stable these machines are due the all steel frame.
 Note: For those of you with a Pressure Pad Programmer model like my White 1502 pictured below, the right edge of the programmer extends forward beyond the edge of the machine . . .

and looking at the side profile you can see that the right panel mirrors this extension.
 Make sure that this extension sits off the table, otherwise your machine will not be balanced. It is designed to sit very flush to the table edge, with a small gap between the lower edge running parallel to the table section.

The Yarn Clips
When you begin to knit, you will attach the end of your knitting yarn to the clip to hold it in place until you have established stitches on the knitting machine. Just open the clip, bring the yarn in front of the clip and then close it firmly to lock the yarn in place.


The next step is to assemble and attach the Yarn Tension Unit to the knitting machine and you can find that information in a previous post by clicking on this link:

The machine bed in general comprises many Principle Parts that you will be working with constantly when you sit at your machine to knit. It is important you understand their function and how they all relate and work in unison. For that reason, my series on the Superba Principal Parts will continue with the following expanded topics:
- The Back Bed.
- The Front Bed.
- The Racking Lever.
- The Intermediary Lever.
- The Bed Position Levers.
- The Carriages.
- The Carriage Slide Rails.
- The Cursor.
- Additional Machine Maintenance.
I hope you find this information helpful and informative.
Kind Regards.
Patrick Madden.
Toronto, Ontario CANADA
superbaknitting@gmail.com
Ravelry Username: Patrick


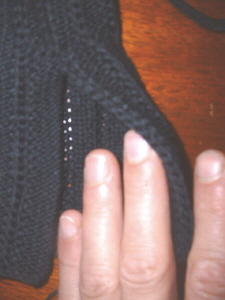
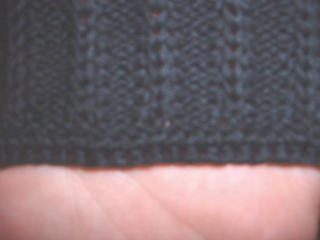
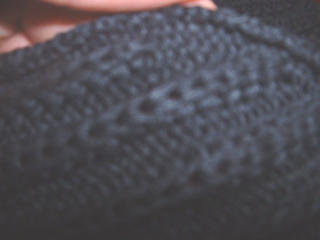
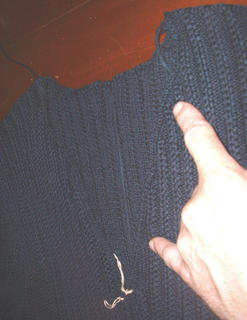
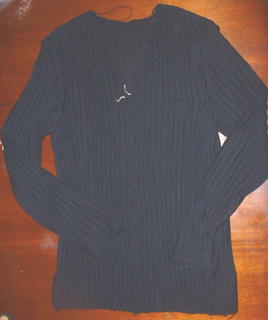 This post is an update on the finishing techniques I used for a Tuck Rib Jacket I'm making out of Italian Cotton Tape. "Tuck Rib" refers to the stitch technique I used. I knit this on my White brand model 1502.
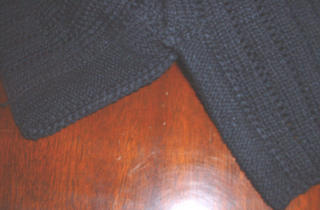


