Greetings!
I've been asked many times about my personal preference for Blocking Boards used to block machine knit, hand knit and crochet items. I contributed the following answer to a Ravelry group discussion about Blocking Boards and I wish to share that with you now.
Blocking Boards for Knitting & Crochet Projects
My preference for blocking Knitting and Crochet projects is to use cardboard fabric cutting boards which are made for pinning out and cutting sewing patterns. These cutting boards are available at better sewing, fabric and quilting stores.
Fabric cutting boards store very easily as they are shipped folded into sections, accordion style, so they take up a minimal amount of storage room in your home and are very light in weight, easy to move and transport. No assembly is required.
 |
| All images and text ©Patrick Madden/Superba Knitting™ |
I've used these boards for decades. They are made of heavy-duty cardboard that is water resistant and have a white paper bonded to one side that is printed with colourfast measurement grids in both inches and centimetres. Opened to their full size they measure 40" wide x 72" long. Some versions are 60" long.
 |
| All images and text ©Patrick Madden/Superba Knitting™ |
These Blocking Boards are tough as nails. Let me repeat that the printed paper that is bonded to the cardboard is colourfast and does not bleed the printed colour onto wet knits or crochet. People tend to be skeptical about this but it's true. I've blocked many a white, off white, cream, pale pink, blue and mauve items and never had any issue with colour bleeding.
 |
| All images and text ©Patrick Madden/Superba Knitting™ |
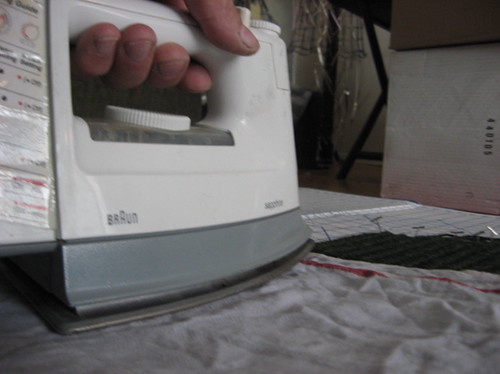
The cardboard does not get soggy so you can wet block directly onto the surface using either a Spray Bottle, or after having soaked and wrung out your project either by hand or using your washing machine spin cycle and also by steam blocking your knits using a home iron.
 |
| All images and text ©Patrick Madden/Superba Knitting™ |
 |
| All images and text ©Patrick Madden/Superba Knitting™ |
I use these for all stages of knitwear production; blocking Gauge Swatches, piece blocking of knitting and crochet projects, and for the regular washing and drying of completed garments.
 |
| All images and text ©Patrick Madden/Superba Knitting™ |
Since we use pins to block with, you have to keep in mind the surface underneath the blocking board as you work. Not every surface is scratch resistant so be cautious. If you choose to do this working on the floor and are pinning into wall-to-wall carpeting you have nothing to worry about but if you doing this on a dining table or wood floor, you need to mind the sharp tips of the pins.
 |
| All images and text ©Patrick Madden/Superba Knitting™ |
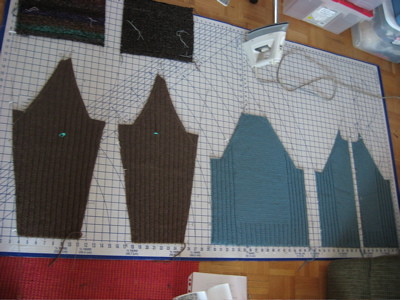
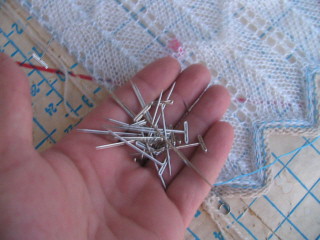
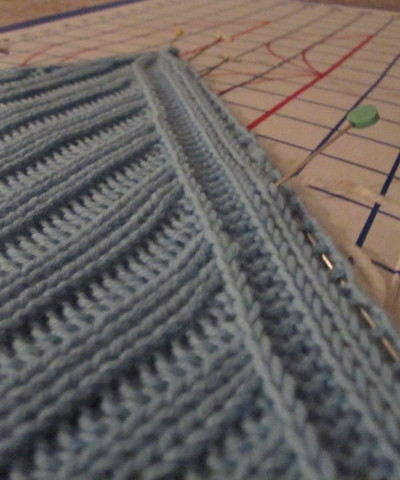
99% of the time I pin into the blocking board at an angle and the pin won't pierce the other side but most pins are sharp enough to penetrate the cardboard so keep that in mind and go easy when pushing the pins into the board. You can buy blunt tip pins to help minimize this but I prefer T-Pins which have sharp points. Blunt tip blocking pins as shown below with the green pin head are available from Clover.
 |
All images and text ©Patrick Madden/Superba Knitting™
|
The photos in this post demonstrate another advantage to using Blocking Wires; you will use less pins when blocking with wires vs. not using wires. Invest in a set or two!
As Blocking is crucial to the finishing of knitting and crochet, these boards allow for all shapes and sizes of your hand work to be blocked. I have multiples of these boards on hand so I can block a single item or group them together to accomodate much larger pieces like blankets and shawls.
 |
| All images and text ©Patrick Madden/Superba Knitting™ |
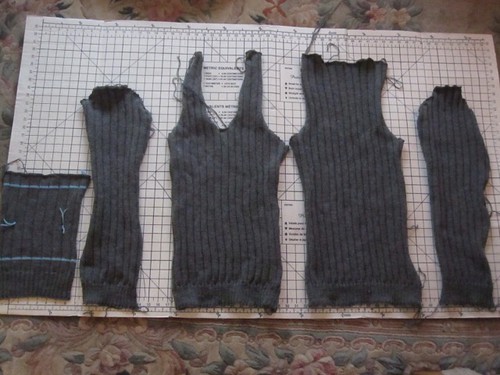
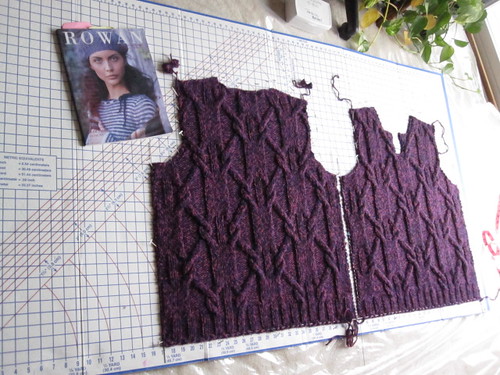
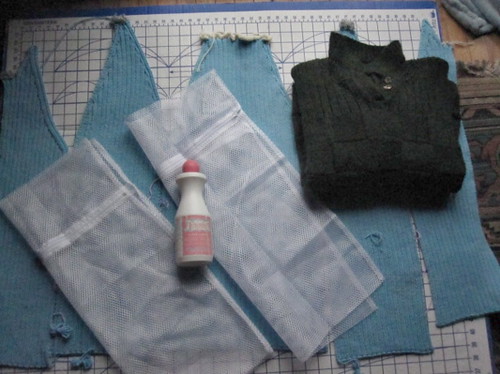
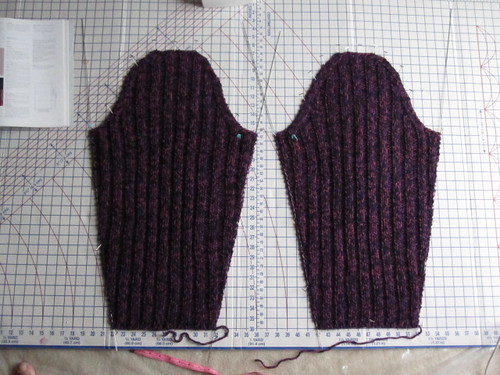
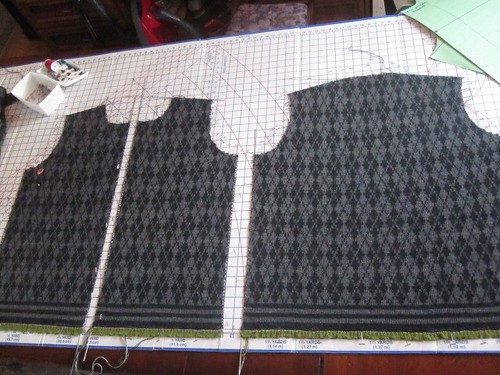
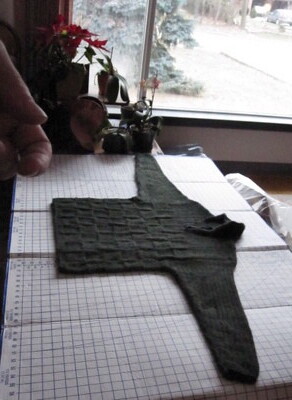
I am a tall man, 6'3" in height and I need more than one board to block a sweater my size, a minimum of two of these Blocking Boards to block personal projects and the boards are inexpensive, so I recommend you purchase two. Best to be prepared. The boards are large enough to accommodate a pullover Front and Back section, so I block those together on one board.
Then I'll block the sleeves on a second board. This project is one I hand knit for myself. The pattern is Lars by Martin Storey from Rowan Knitting Magazine 36. The yarn is Rowan Plaid.
 |
All images and text ©Patrick Madden/Superba Knitting™
|
|
A great feature of these sturdy yet light weight blocking boards is that once you are done blocking you can stand the blocked pieces up and set them out of the way! Perfect if you have a dog or cat or curious children running through your home or if you live in a small space and don't have the room to leave a project out all day.
 |
| All images and text ©Patrick Madden/Superba Knitting™ |
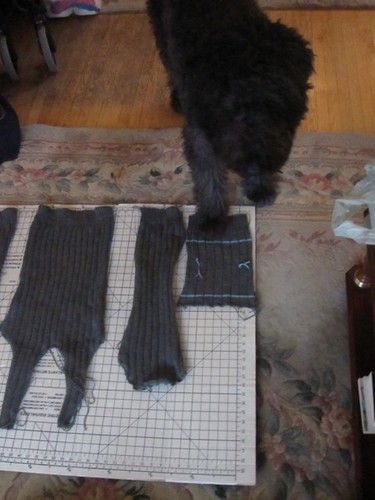
If you have dogs or cats and you've been blocking your knitting project down on the floor, you can identify with the following photos. Your pets will come and paw at it or walk across your knitting or even lay down on top of your work as they are curious as to what you are focusing on, which in their opinion should be them!
 |
| All images and text ©Patrick Madden/Superba Knitting™ |
In this next photo I had just spread a sheet on the floor to quickly compare lace sections during knitting and two of my dogs pounced. LOL! Crazy critters! To deter this from happening to you can quickly pick up this style of blocking board with the project pinned to it and lean it against a wall with your knit or crochet project facing the wall to keep the fabric from being rubbed up against or slobbered on! This works just as well if you have young children or are trying to surprise someone with a gift. Stand the board up behind your sofa or the headboard of your bed or facing the deep freezer in your basement. They won't notice a thing.
 |
| All images and text ©Patrick Madden/Superba Knitting™ |
Generally I will block in one area of the house as I now have a dedicated blocking table set up but these boards allow you the freedom to do this in any location.
You do need a fairly firm surface underneath. One can lay a board on a bed and block that way but I find a mattress to still have too much movement for my liking during the pinning stage. I prefer my height-adjustable blocking table, our dining table or the living room floor. It's all about options!
 |
| All images and text ©Patrick Madden/Superba Knitting™ |
These cutting board allow you the option to dry your project with the board standing or laying on a surface. The added bonus to this is the air circulation they provide. You will find your wool and wool blends, acrylic/microfibre, silks, etc will dry very fast on their own.
 |
| All images and text ©Patrick Madden/Superba Knitting™ |
If you are working with a stubborn fabric like Cotton or Linen or a blend of these fibres, which release the moisture they've absorbed much slower, you can stand these boards outside on your deck or balcony or place one next to (but never over) a heating vent or in the same room as your home furnace. Having a household fan circulating air also helps to speed up the drying time. This is especially true in countries which have a Winter season.
 |
| All images and text ©Patrick Madden/Superba Knitting™ |
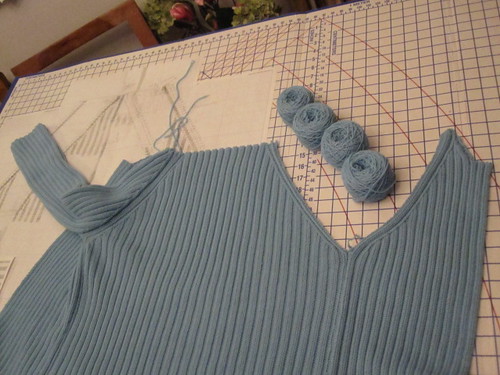
Worried about how much a knit/crochet piece is going to stretch? Stand it up on the board and observe the effect of gravity. I often block my pieces in the morning then go to work and come home to a dried, beautiful piece of knitting and rarely do I ever get any stretch to my knits as they dry this way.
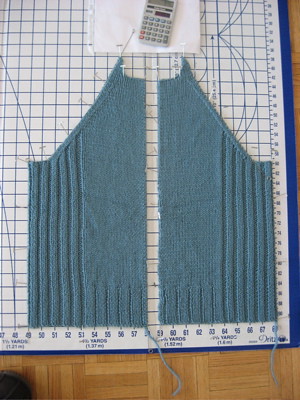
I especially like the printed 1" square grids and the straight edges the printed lines provide. This makes for accurate blocking of the geometric shapes we knit and they also serve to speed up the blocking process and help achieve balanced sections to our work so that the Back and Front and the two sleeves turn out to be the same size and proportions.
 |
| All images and text ©Patrick Madden/Superba Knitting™ |
The measurement scales printed along the horizontal and vertical are in Inches and Centimetres. These, together with the grids and lines, make for fast and easy blocking and pairing of sections, IE blocking the Front and Back or two Sleeves, as you can block one piece and then quickly block it's pair next to it using the grids for reference.
 |
| All images and text ©Patrick Madden/Superba Knitting™ |
The grid markings will also help you identify visually if you have made a mistake in your knitting, IE you have knit one Cardigan front section longer than the opposite side. You may be upset to discover this mistake but this allows you to rip back and reknit this piece before you block and seam.
 |
| All images and text ©Patrick Madden/Superba Knitting™ |
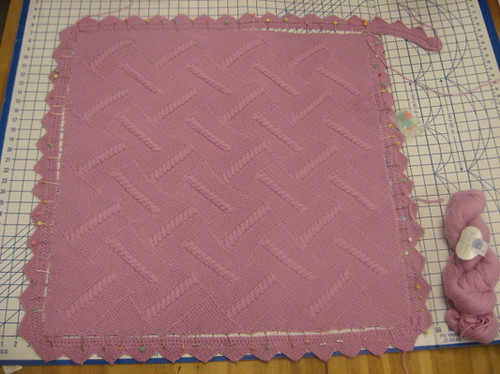
The grid lines and straight edges are also very helpful when blocking straight edges and for consistency in the blocking of decorative scalloped, saw-tooth or chevron shape edges, very popular in contemporary knitwear and crochet.
 |
| All images and text ©Patrick Madden/Superba Knitting™ |
The grid lines and straight edges also help you refine the spacing of decorative details you may have created and allow you to judge the height and width of decorative elements.
 |
All images and text ©Patrick Madden/Superba Knitting™
|
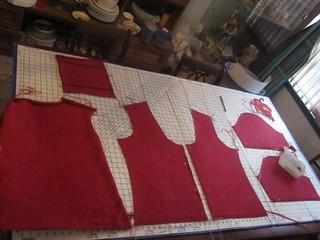
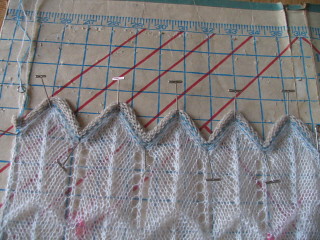
Below you can see one of my oldest cardboard cutting boards. This has to be at least 25 years old. I should retire it but some days I will block multiple items as was the case on this day the photo was taken and it still did the job.
Note the pin holes in the cardboard. Overtime these will accumulate but they don't weaken the structure of the board and while they obviously do not self-heal, they don't interfere with the blocking process.
In this photo I had just pinned this hand transferred Chevron edged lace Gauge Swatch to the board and then I took the photo. What I did and what you will do during the process, and I will be demonstrating this in detail later, is using the 1"/2.5cm grid to balance out the length and width of you knitting and you can't accurately do that without a point of reference. Note that the tips of the lace Chevrons are not spaced evenly. Sometimes you have to pin, pin and repin again, adjusting the fabric both in width and length, nudging it into place to get it to be balanced. Especially with machine knits, and also very often with Lace Stitches. So this style of blocking board becomes invaluable for this reason.
 |
| All images and text ©Patrick Madden/Superba Knitting™ |
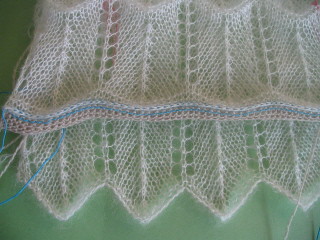
Next is the before and after photo of blocking this hand transferred lace stitch worked on my SUPERBA/WHITE 1502 double bed model knitting machine. These blocking boards made the finishing process for that project that much easier.
 |
| All images and text ©Patrick Madden/Superba Knitting™ |
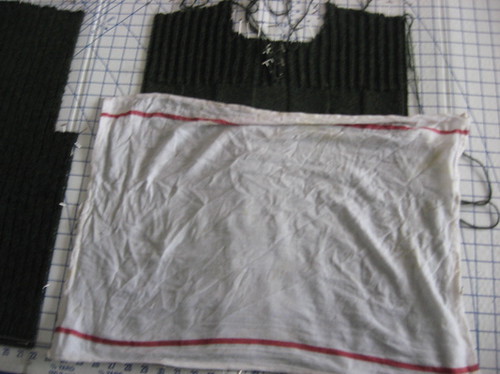
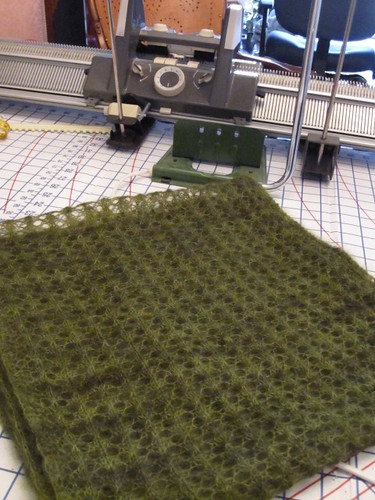
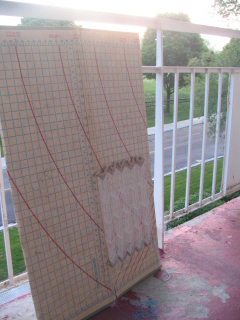
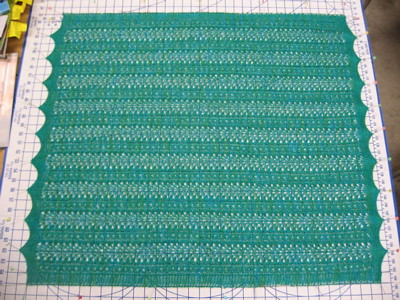
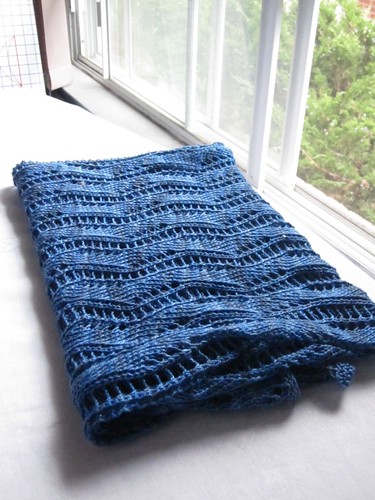
Here is another great example of the versatility of the accordion shape of these blocking boards. They are light weight and fold up easily, allowing me to fold up the excess panels I don't need underneath each other and I can place a folded board on top of my ironing board and I have the printed grids and straight edges to use for blocking smaller projects to their proper shape. The project shown is a hand transferred lace scarf I knit on my SINGER 624 model knitting machine.
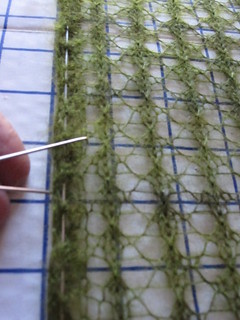
You can clearly see the "before" unblocked section on the left, and on the right is the lace fabric with blocking wires inserted and pinned to the proper width and length. Once you've stretched the fabric to the proper width and pin the blocking wires along the blocking board grid lines, then you can mist the fabric or use a steam iron to set the stitches. Voila! Fast and straightforward blocking of knits.
This is such a time saver and comes in very handy with Lace projects, as in combination with the blocking wires the printed grid on the cutting board provides a reference for how "hard" to block a completed project and create an accurate shape. Some people prefer a softer look to their lace, what we refer to as an organic look and some prefer their lace to be blocked hard, producing a crisp, defined look to the stitches and fabric. This makes this style of blocking board an important tool to achieving the look you want to your finished knit and crochet items.
 |
| All images and text ©Patrick Madden/Superba Knitting™ |
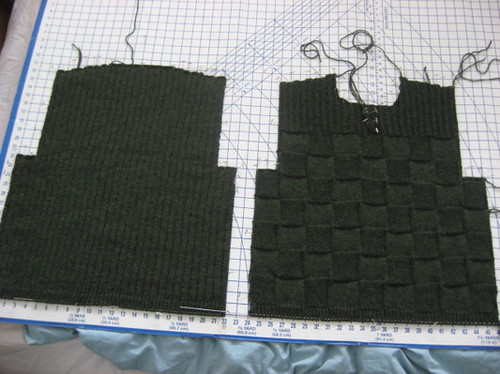
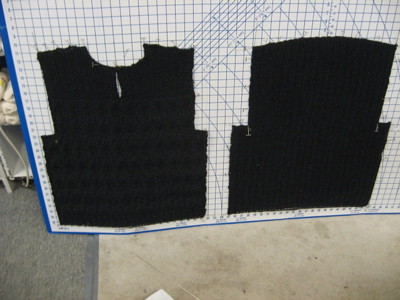
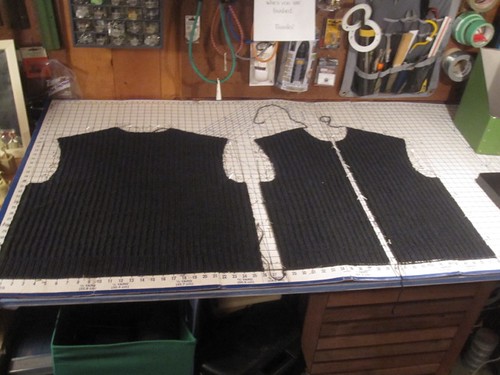
I also block my completed sweaters on these boards for regular cleaning. They allow me to dry and re-block my sweaters to shape after washing. This is important especially with textured knits or anything with a defined stitch pattern.
 |
| All images and text ©Patrick Madden/Superba Knitting™ |
 |
| All images and text ©Patrick Madden/Superba Knitting™ |
I recognize that there are other styles of Blocking Boards and mats available on the market, and many Do-It-Yourself options involving PVC pipe and wires, but this is my tried and true preference for a blocking surface and it has done me and my students well over the years.
I hope you find the information and point of view presented in this post helpful. Kindly remember that all images and text are copyright Patrick Madden/Superba Knitting™. All rights reserved.
Take good care and happy knitting!
Patrick Madden.
"Patrick" on Ravelry.
www.superbaknitting.com
Toronto, Ontario CANADA