
Greetings and Welcome to Superba Knitting™.

In this post I will share with you the basic oiling and cleaning process I routinely follow in order to keep my Superba Double Bed Knitting Machines in working order.
This works on all models of SUPERBA, SINGER, WHITE and PHILDAR Double Bed and Single Bed model knitting machines made in France.
• Cleaning Overview
The performance of your Superba Knitting Machine depends on how well you maintain it and keep if free from dust, lint and oily residue. This quick and easy maintenance is ongoing and accomplished every time you sit at the machine to begin knitting.

It is a simple two-fold process where oil is lightly applied to a cloth to wipe down the parts that receive oil, removing any residue that has formed from yarn fibres combining with the oil.
We then repeat the process, leaving behind a clean application of oil to act as a lubricant.
That's really all there is to it when cleaning and oiling a SUPERBA knitting machine as part of regular maintenance. Compared to other brands of knitting machines, a Superba uses very little oil.
When not being used, always cover your knitting machine to prevent dust buildup.

Where Do I Begin????

• Gather the Cleaning Supplies and Tools
- The Lint Brush that came with your machine.
- A soft bristle, narrow paint brush. Great for getting in tiny spaces on your machine and Carriages.
- Singer Sewing Machine Oil™.
- 1 old T-Shirt: cut up into strips the size of your hand.
- Vacuum Cleaner with crevice attachment.

• FYI: Yarn Fibers + Oil = Lint & Sticky Residue
Once you begin the knitting process, the back and forth motion of the Carriages and movement of the needles will cause balls of lint to form.
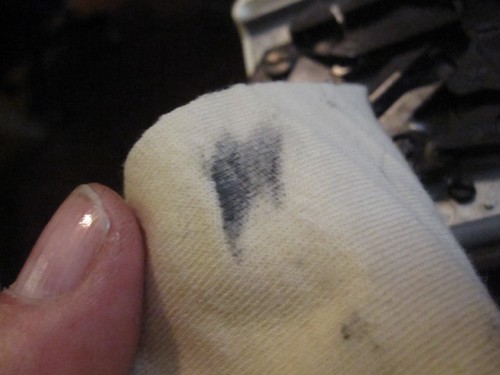
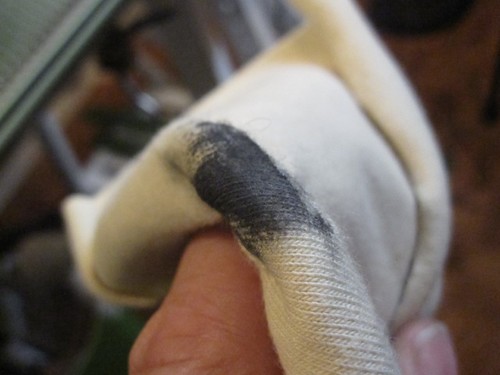
Furthermore, the oil we use on our machines will eventually degrade and also become clogged with yarn fibres. The result of this is a black residue that inhibits the smooth movement and operation of your machine. The photo below shows how dark this residue is and so it must be removed or it causes your machine to drag and not glide back and forth as designed to do.
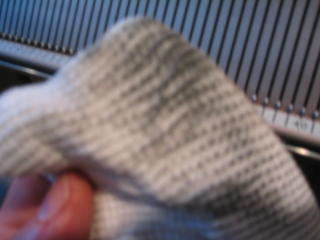
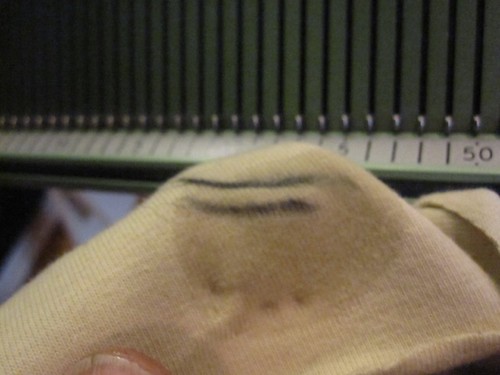
Knitting with natural fibres such as Wool, Alpaca and Mohair can throw off a tremendous amount of lint, especially if it is dyed Black or another dark colour. It can even clog your yarn guides as shown below.
 As our hands are in constant contact with both the machine parts and the resulting knit fabric, be cautious of what you are touching and keeping your hands clean. Wear an apron or some kind of smock to wipe your hands on and remove the oil and residue that will end up on your fingers.
This is especially true when knitting with White or Cream coloured yarns. You can easily transfer oil and black stains which may not come out with washing, so be cautious.

• Dusting & Vacuuming
Before adding any oil to the machines, you want to remove any dust, fluff or link accumulated.
• Tools:
Vacuum Cleaner, Dusting Cloths, Soft Bristle Cleaning Brush and/or Paint Brush.
 If you have just unpacked your machine, please be cautious of Styrofoam and other packing material caught in the various grooves and channels on your knitting machine. Take a lint brush or a soft bristle paint brush and using your vacuum cleaner, remove all bits of foam bits and other debris.
 Begin by wiping down all the machine parts with a dusting cloth. I did not say add any oil! Just dust your machine.
TIP: To clean my knitting machines I cut up old T-Shirts into small pieces of fabric to use as dusting and oiling cloths.
I keep them in a bag next to my machine. You will use these cleaning rags continuously during the knitting process to wipe down your machine and apply oil.
 Old T-Shirts are a good choice as having been washed numerous times, they will not distribute any lint back onto your machine. Cotton fibres are very absorbent and perfect for removing excess oil and especially the grime that forms as the oil breaks down and combines with the lint that falls onto the machine from our yarns.
I also highly recommend Lysol Disinfecting Wipes for wiping clean the plastic covers on the machine bed and Carriages.
• Vacuum The Needle Bed
Use your vacuum cleaner to aid in the removal of lint. Start at the top of your machine by wiping the Yarn Tension Guide and don't forget the Tension Discs.

Caution: If you just knit with a Navy Blue colour and are about to work with a Beige colour, you might end up with a unsightly dark line in your knitting due to lint from the darker yarn being taken up by the lighter yarn in the first few rows of knitting. To avoid mishaps like this it's imperative you keep your knitting machine clean, clean, clean.
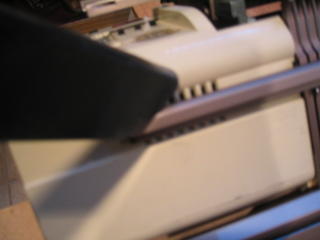
Use the crevice nozzle accessory that comes with your vacuum cleaner and run it across both needle beds to extract any lint accumulated in the needle channels. Cover all sections thoroughly, including the Flow Combs.
Using either the Lint Brush that came with your machine or a small, narrow bristle paint brush (my preference) start brushing the grooves and needle channels of the knitting machine to loosen and remove as much dust and lint as possible.
 Make sure to move all the needles on each bed from Non-Working Position no.o to Working Position no.1, and clean up against the Lower Slide Rail. Then move the needles up to Position no.3 and repeat.
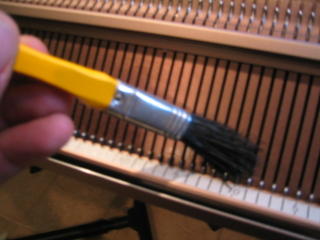 Use the paint brush to work out lint and other debris that may be lodged in the grooves of the needle channels on the machine bed.
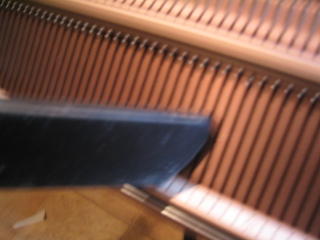
Give the exterior shell a good vacuum to remove any stray bits of lint and fluff.
Tip: When knitting with lighter coloured yarns, always wipe the table surface surrounding any yarn with a dust cloth to remove any link that might be picked up by your knitting yarn.
With the machine now free of excess lint and fibres we can move on to oiling.
• What Brand of Oil Do I Use For My Superba Knitting Machine?

You will read the opinions of other knitters who recommend using Gun Oil, which is just another fine grade of oil for mechanical parts. I've never used this nor do I feel I have been lacking. Singer Sewing Machine Oil is very reliable and of excellent quality and is widely available.
Please note: Never, never, never use any other kind of lubricant or water displacing sprays on your knitting machine. EVER!
While being a well known product of excellent qualities, WD-40™ is never to be a used on a home knitting machine. WD-40 is a water displacing lubricant for metal that has become wet and started to rust. It is not designed for the purposes of oiling a home knitting machine.
Lubricants are of a heavier density than fine grade machine oil and can seriously damage your machine by causing them to gum up with a residue that is very hard to remove. I don't care what you have used this product on before to great satisfaction - do not use any lubricant on your Superba. You have been for-warned.
• Where Do I Apply Oil?

A light application of Oil is done before beginning to knit, during knitting as determined by the machine and when I finish one piece and start another section of a garment. It is an on-going process where your machine will send subtle signals that it needs more oil.
NOTE: The speed at which your knitting machine operates, combined with the rapid flow of yarn through through the Upper Yarn Guide, means that the oil will break down fairly quickly anyways.
Superba Knitting Machines and their Carriages are small, compact and very light. For the most part (as this depends on Stitch Technique, needle arrangement and yarn choice) the Carriages should glide across the needle beds.
TIP: If your machine feels like it is laboring and stiff as you are knitting rows, this is a tell-tale sign to stop and wipe the needle Heels down with a cotton cloth and then re-apply a light coating of clean oil.
Resume knitting and the Carriages will distribute the oil to the cams and channels on the underside of the Carriages.

• How Do I Apply Oil to My Knitting Machine?
Bring to Working Position No.1 the number of needles you wish to knit with.
 We need the needles is this position so they may be engaged by the Carriage(s).
Reminder: Make sure your needles are in Working Position No.1 when oiling a needle bed.
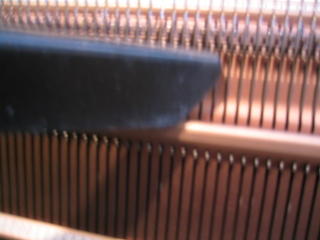
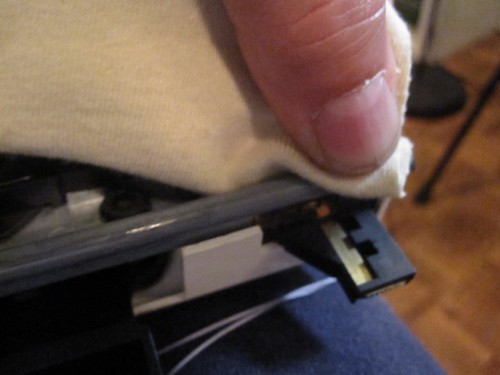
Needles in Non-Working Position, shown in the photo below to the left of the pointer, will be by-passed by the Carriages and won't get any oil. We need the Carriages to assist in distributing the oil so bring the needles you intend to knit with to Working Position no.1.


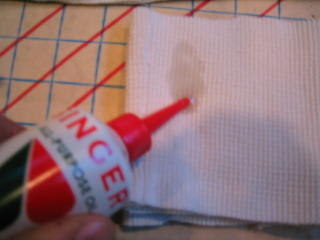
Using an old T-Shirt cut into small strips, apply a small amount of oil to the corner of a cloth. . . Not too much - just enough to saturate a small section of the cloth...
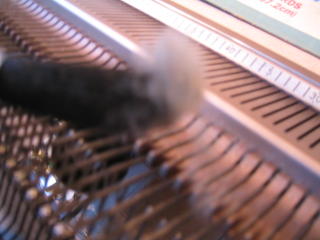
 Next, pinch the oiled section of cloth between your finger tips and run this along the "Heels" of the needles that you have selected to knit...
Repeat this on the Front Bed needles if you are working with both needle beds...

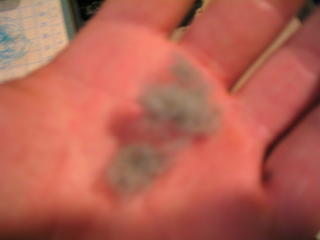
 When you remove the cloth and examine it, if there is a lot of black residue, repeat this process until the amount of black grime is reduced.
 Now you will pass your knitting machine Carriages back and forth several times across the selected needles..... Either the Back Bed Carriage alone if knitting single bed stitches...
 or both the Front and Back Carriage joined...
 This movement will automatically distribute the oil to the Carriage Cams and channels that the needles travel through, located under the Carriages...
 I then examine the needle bed above and below the needles and wipe off any excess oil that has accumulated ...
• DON'T OVER OIL!
It is quite possible to apply too much oil to the machine - even using a cloth to apply the oil.
After moving the Carriages over the needles a few times you may see excess oil sitting on the needle bed. Continue to wipe the needle bed surface with the cloth to remove any excess oil. Change the cloth for a new clean piece often and repeat until the needle bed is clean.

• OILING THE CARRIAGE SLIDE RAILS
This is not shown or suggested in your knitting machine manual but I find it does help my machine flow smoother by cleaning the Carriage Slide Rails and then adding just a drop of oil to the rails - JUST A DROP ~ NO MORE! ... here's how.

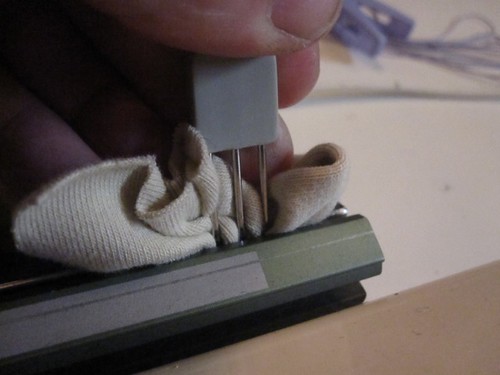
Remove the Carriages from the machine bed by depressing the Carriage Release Levers at one end, remove from the machine bed and turn over and wipe down the Carriage Slides to remove any grime residue.

The Slides are the thin, round, pale grey tubes attached to the bottom section of the underside of the Carriages. These are what the Carriages slide upon as they move back-and-forth as you knit.
Here you can see some grime residue that was wiped off the Carriage Slide.

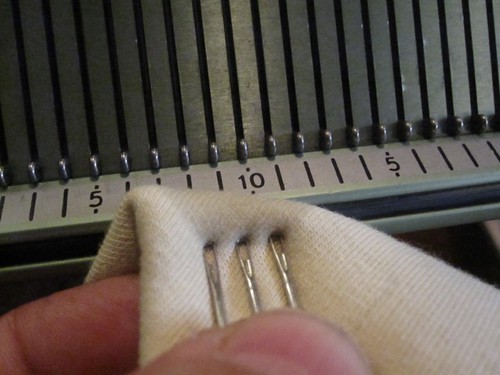
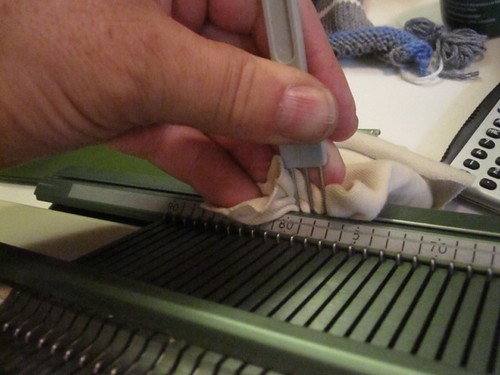
and then using a 3-Prong Transfer Tool, push the oiled section of rag into the Slide Rail channel and slide the rag back and forth to pick up any grime in the channel. . .

Repeat this as necessary, continuing to add a small drop of oil to a different section of the cloth until the cloth comes clean.
You'll be surprised by how much dried gunk may be in the channel, and this does slow down the movement of the Carriages. These photos are taken after I knit 4 pairs of Socks on my machine. So that's a fair amount of back-and-forth movement across the Slide Rails, and the oil breaks down. It's the way it goes. So clean regularly.
Then repeat this on the Back Bed of your SUPERBA Knitting Machine.

Repeat adding 1 drop only! to the Front Bed Lower Slide Rail
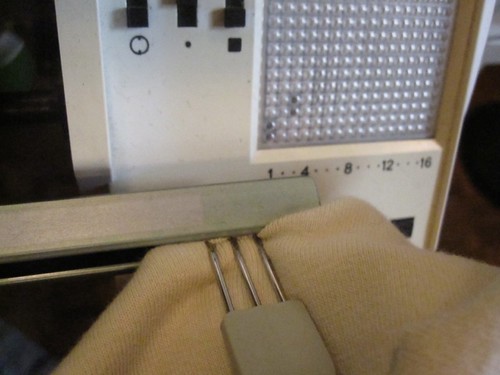
 then pass the carriages back and forth to distribute the oil...
In the photo below you can see some excess oil sitting on top of the lower rail - just wipe this off with a cloth.


As careful as you think you might be, the fact is that with machine knitting our hands do come into contact with parts that are coated with oil. This can be easily transferred to the knit fabric when we stop to examine our knitting so be cautious.
Voila! The machine is oiled and ready to knit.
I hope you find this information helpful.

For more knitting machine help and assistance, I invite you to join the SUPERBA KNITTING GROUP on Ravelry.com - Ravelry is the world's best online forum and database for Hand Knitters, Machine Knitters, people who Crochet, Weave and spin their own yarn.
Happy Knitting.
Patrick Madden.
Toronto, Ontario CANADA
©SUPERBA KNITTING.

A Word About The Various Brands of French Knitting Machines Produced by S.I.T./Groupe Superba
 ® The Superba brand was distributed all over the world and the model numbers include Superba S40, S46, S47, s48, System 624, System 9000.
 ® The White brand was distributed only in North America and includes model numbers 1402, 1502, 1602.
(** In North and South America, the Singer Company distributed home knitting machines produced by the Silver Reed Company of Japan - a completely different style of home knitting machine and operating system. The information here is for Singer machines made in France.)
 ® Phildar is a French textile company which retailed S.I.T./Superba knitting machines in their Phildar Yarn Stores throughout France and Belgium. Models included the Phildarmatic D120, D140.