

Greetings!
Did you just receive a Light Scanning Selection Box model Superba and need help on how to attach it to the machine? Forgotten how to insert a design card? Can't remember how to set the cursor?

Then follow the steps outlined in this quick reference guide for attaching and programming the Selection Box for Superba ~ Singer ~ White ~ Phildar Light Scanning models.

A Few Reminders About The Selection Box.
- For first time users of the Selection Box, note that this part is very fragile and should be handled with care.
- When finished using the Selection Box, always remove it and store it safely in a cupboard wrapped in bubble wrap.
- Never leave the Selection Box plugged in to the machine with the power on for long periods of time. No, you won't start a fire; it's just there is no cooling fan in the box and the circuit boards can get hot and stop working.
- Respect the weight limit of the yarns you use for knitting on this model of machine, especially for Double Bed Jacquard or your machine will have difficulty knitting the stitches.
- If you just received your machine and are just itching to try the Double Bed Jacquard stitches then purchase the correct yarn for this technique. Go online and order coned yarn of the weight "2/24". Write that number down. That is a specific knitting machine yarn weight that you can easily purchase on the internet or from a local weaving supply store. This is the weight your machine was designed to knit with for "Double Bed" Jacquard.
- Do not try using any hand knitting yarn (sock yarn or baby yarn) for Double Bed Jacquard. These are too heavy for this stitch technique.
- You can use these weights for Fair Isle aka Single Bed Jacquard, which is knit on the Back Needle Bed only.
• Light Worsted (Hand Knitting Needle size US #7 or 4.5mm) use Machine Stitch Size 9 thru 12.
• Double Knitting or Sport Weight in the US (Hand Knitting Needle size US#5-6 or 3.5mm -4mm) use Machine Stitch Size 8 thru 11
• 4-Ply Fingering/Baby Yarn/Sock Yarn (Hand Knitting Needle size US #2-4/2.75mm - 3.25mm) use Stitch Size 6 thru 9.

The most important point to remember when programming the Selection Box is:
It's all about setting the Cursor!!!
The Programme Switch controls the connection between the Selection Box and the Cursor Belt on the underside of your machine.
When set at Neutral (middle - white dot) the Cursor Belt on the knitting machine is not engaged which means it is free to move. We use this Neutral setting to Position the Cursor on the Back Bed of the machine before aligning with the Cursor Indicator on the Selection Box.
When set at Neutral, when you slide the Cursor on the machine bed back and forth, it should move without any tension on it. Smoothly and easily.
SET THE CURSOR
We need to align the Cursor Indicator on the Selection Box with the Cursor on the Back Needle Bed.
These two work in tandem and must be aligned before programming or the Selection Box will not scan properly! Now read the last two sentences again and burn them into your memory!
Step 1:
SET THE CURSOR INDICATOR AT NEEDLE #1 ON THE SELECTION BOX.
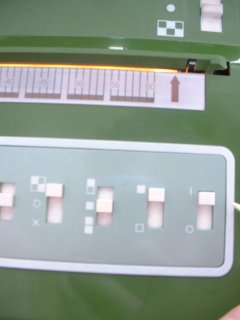
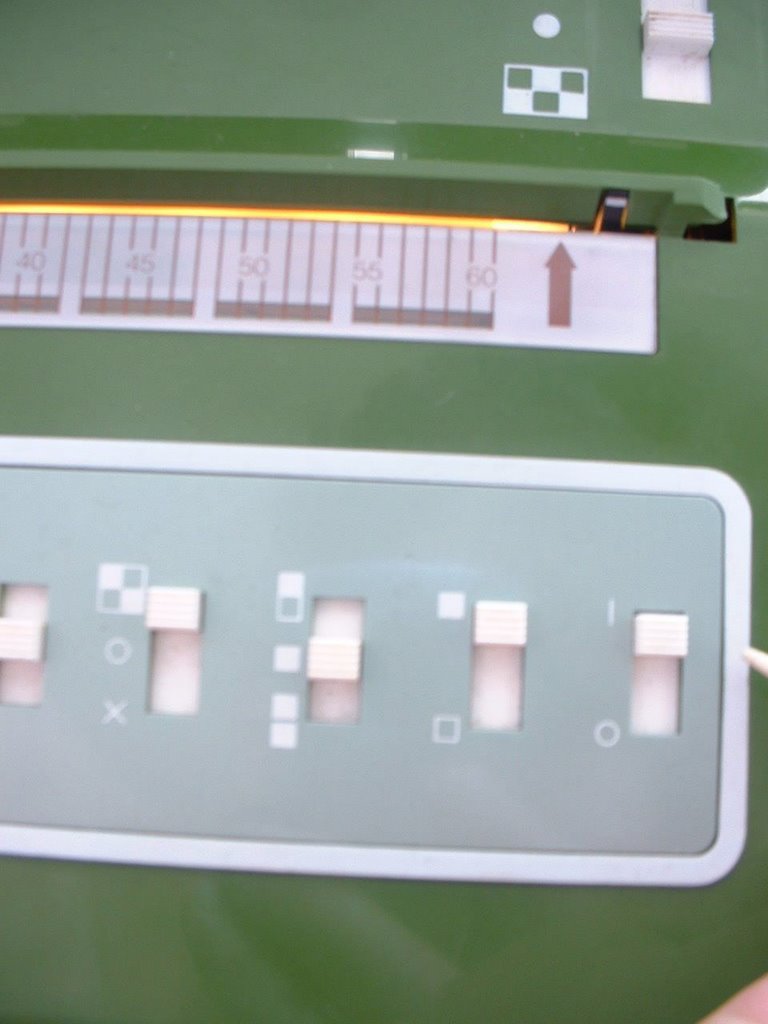
This is the Cursor Indicator on your machines Selection Box . . .

and you need to get one of two tiny little white squares to sit in the far left see-through window. . .

To do this you must slide the Cursor on the Back Bed of the knitting machine back and forth. . .
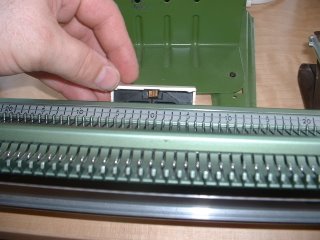
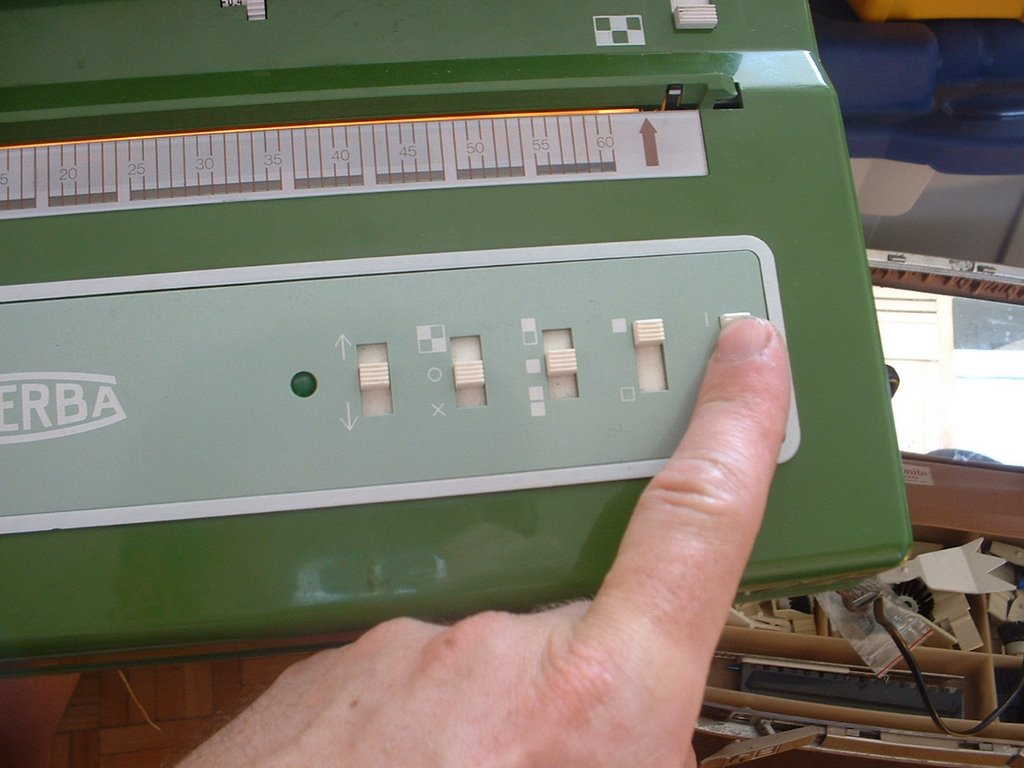
As you do this look at the front of your Selection Box. Look at the clear indicator window which has a scale numbered 1-60 just below the scanner light.
You should see 1 or 2 little white squares moving across this clear window as you move the Cursor on the back needle bed. This is the Cursor Indicator.
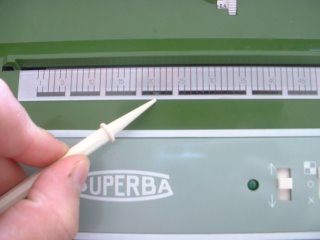
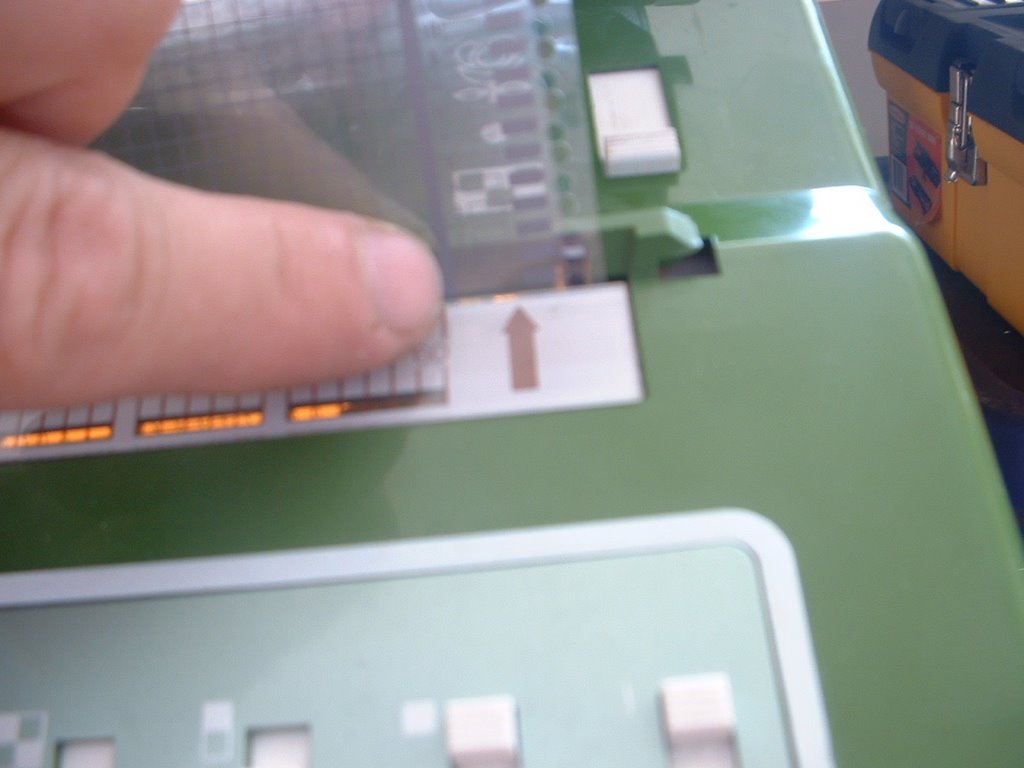
IT IS CRUCIAL TO MOVE ONE OF THOSE LITTLE WHITE SQUARES TO BOX NUMBER 1 ON THE FAR LEFT OF THE INDICATOR.
It should be visible where I am pointing as in the photo below. This represents needle number 1 of your stitch pattern.

Step #2:
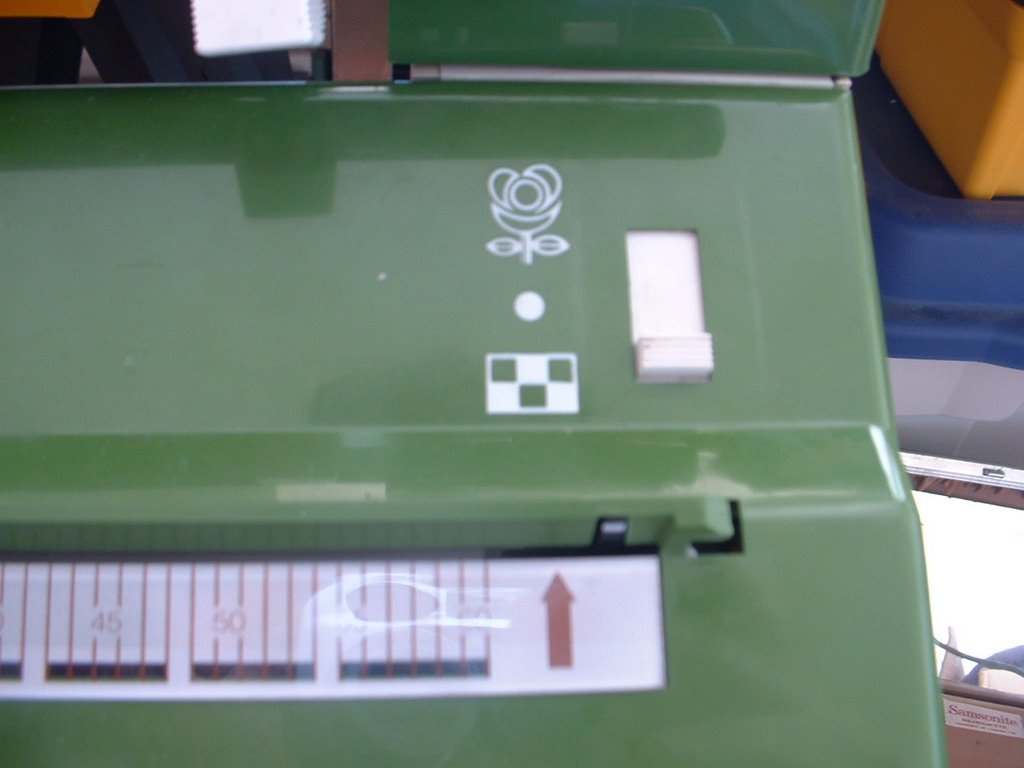
SET THE PROGRAMME CHANGER TO NEUTRAL
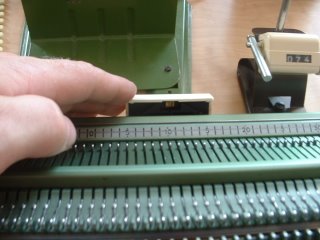
• Slide the Programme Changer switch back to the middle position aligned with the dot symbol. The Cursor Indicator on the Selection Box is now locked in at Needle #1.
Step #3:
SET NEEDLE #1 ON THE BACK BED.
• The Selection Box needs to know which of the 180 needles on the back bed it should use to centre your Stitch Design.

Slide the machine Cursor across the Back Bed until it the centre of the Cursor is positioned directly over needle #1L.
This is the first needle to the Left of Centre "0" on the Needle Scale. This is the default setting for centring all stitches.
• Now slide the Programme Changer on the Selection Box back down to the to Geometric Setting.
• Then slide the Cursor back to the far right, firmly up against the Cursor Stop.

VOILA!
YOUR CURSOR INDICATOR ON THE SELECTION BOX IS NOW ALIGNED WITH THE CURSOR ON THE BACK NEEDLE BED.
To Begin Knitting:
•The Carriage will be on the Right end of the machine. Make sure it is to the right of the Cursor Stop.
• Remember: Slide the Cursor to the far right along the Back Needle Bed and push it firmly up against the Cursor Stop. The Cursor must be locked into postion here before proceeding.
• Set your Carriage Stitch Keys for the desired Stitch Technique.
• If working Fair Isle or Jacquard stitches, insert and thread the Second Yarn Guide onto the Back Carriage.
• Set the Selection Box Switches as per your Instruction Manual to achieve various stitch effects.
• Set the appropriate Stitch Size for the yarn you are knitting with and for the Stitch Technique you are using.
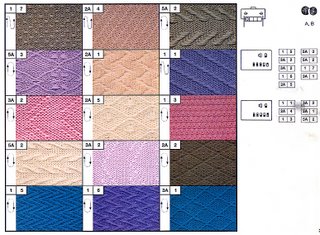
• Insert a Geometric Mylar Programme Card into it's plastic cover and clip this into place.

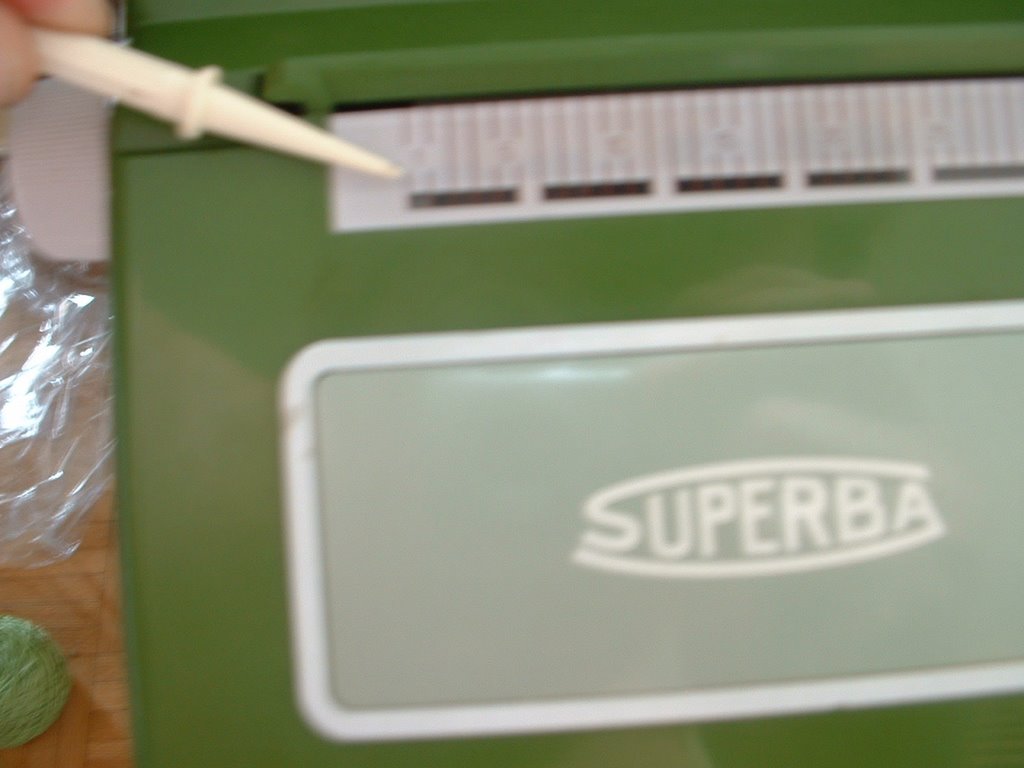
• Insert the Programme Card into the horizontal opening on the Selection Box. It's close to the top edge of the Box, just above the Cursor Indicator.


• Line up the Pattern Number you want to knit with. The pattern number is printed on the right hand column of the card in teeny tiny little numbers. I use - I kid you not - a magnifying glass to be able to see and read these.
In the photo below you can see the pattern #3 printed on the far right.
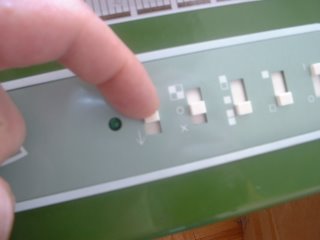
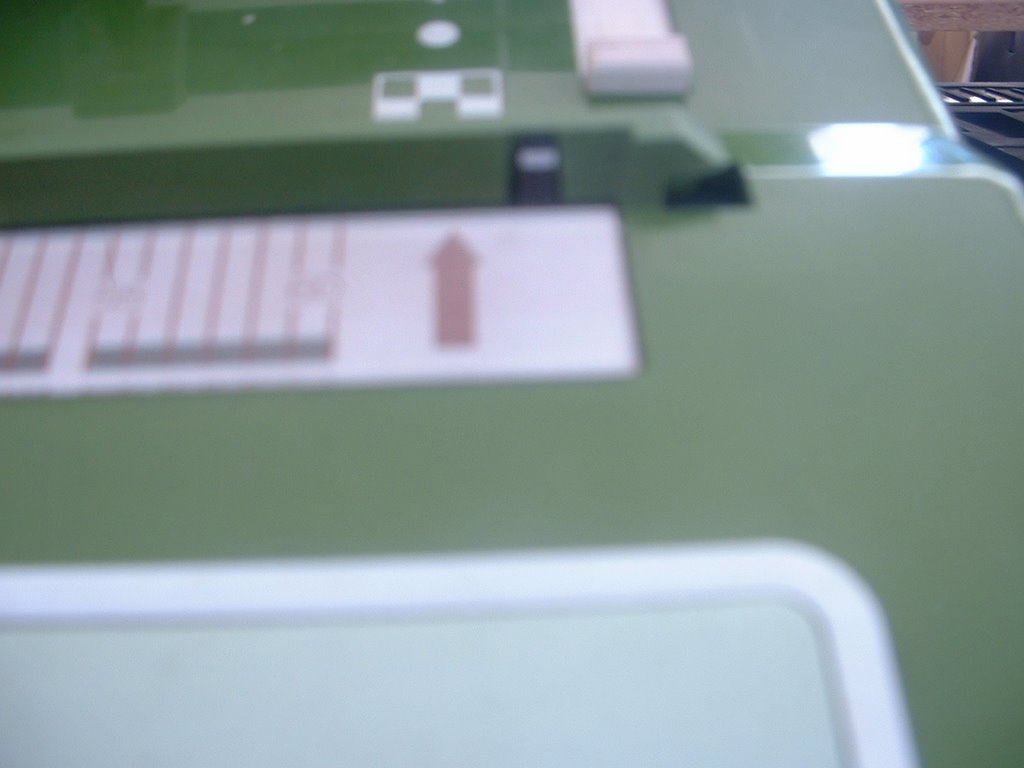
You will line this number up with a teeny-tiny white indicator at the far right of the opening.

• This is the white indicator I am talking about:
The little dash on the extreme right end of the opening where you insert you card. Just above and to the right of the Arrow printed on the box.
Here I show the card inserted. On the right column of the card are tiny numbers to denote the starting line of a stitch pattern. Line these numbers up with the white indicator.
WE ARE NOW READY TO KNIT.
ONCE THE PATTERN IS SET AND READY, GIVE TWO QUICK PULSES OF THE CARD ADVANCE SWITCH UPWARD. The Selection Box buzzer SHOULD go off, indicating you may begin knitting.
 Knit your first row and the buzzer will stop.

Continue knitting as per your project.
Note:
If the Selection Box does not buzz, pulse the switch again. Repeat if necessary.
OR realign your Mylar pattern with the white indicator and try again.
OR if the card continues to reverse and the motor won't stop turning and it comes out of the Selection Box, turn the box off and on again. Insert the card and try again.
Note: If the card is marked as continuous, it will move back and forth in the Selection Box until you are done knitting.

NOTE: Some longer/larger stitch designs are marked to be knit once and then you will have to pause your knitting until the Selection Box motor has rewound the card back to line 1.
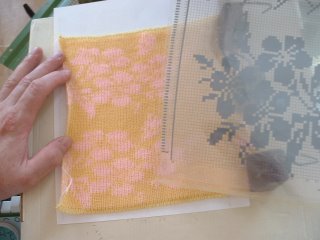
The Selection Box buzzer will buzz continuously cautioning you to stop knitting and wait until the card is back on row 1. Card 4, the Floral Design does this. Once the card has rewound back to row 1, it will buzz again until you knit the first row.
For All Stitch Techniques: Please refer to the stitch guide and instruction manual that came with your machine and set your Carriages and the Selection Box according to these instruction settings BEFORE you start knitting.

 ® The Superba brand was distributed all over the world and the model numbers include Superba S40, S46, S47, s48, System 624, System 9000.
 ® The White brand was distributed only in North America and includes model numbers 1402, 1502, 1602.
 ® The Singer Company** distributed home knitting machines in Europe produced by S.I.T./Superba. Many models and colours were produced including Memomatic & Singer Freestyle Models 600, Memo II, Singer 2310 - 2340, Singer System 624 & 9000.
(** In North and South America, the Singer Company distributed home knitting machines produced by the Silver Reed Company of Japan - a completely different style of home knitting machine and operating system. The information provided here is for Singer machines made in France. If it doesn't look like the machines pictured here then you are in the wrong place!)
 ® Phildar is a French textile company which retailed S.I.T./Superba knitting machines in their Phildar Yarn Stores throughout France and Belgium. Models included the Phildarmatic D120, D140.
Patrick Madden
Toronto, Ontario CANADA
www.superbaknitting.com
- Do not try knitting with a Worsted "Sayelle" Acrylic yarn. It won't fly. Too thick stiff and not enough elasticity. Do try Silks, Alpaca, Merino, and Cottons.
Ok- let's begin.


The most important point to remember when programming the Selection Box is:
It's all about setting the Cursor!!!
- Before you attach the Selection Box to the machine you MUST position the Cursor on the Back Needle Bed at Centre "0" printed on the Needle Scale. . .
- Slide the Cursor across the Back Bed until it lines up with the "0" BEFORE attaching the Selcetion Box to the machine.
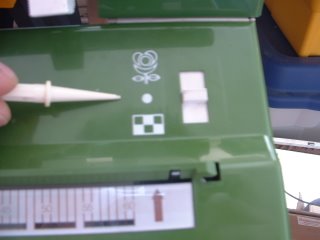
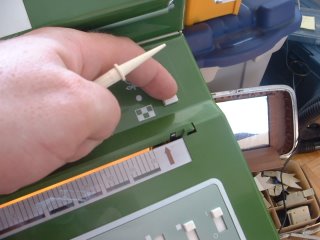
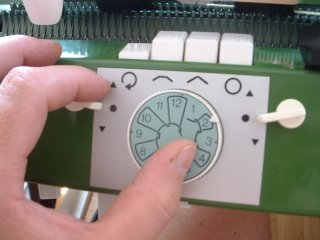
- On the Selection Box set the "Programme Switch" on the far right to the "Neutral" position, which is represented by the white dot that I am pointing too in the picture. . .

- This switch can be rather stiff to move and there is a reason for this.
The Programme Switch controls the connection between the Selection Box and the Cursor Belt on the underside of your machine.
When set at Neutral (middle - white dot) the Cursor Belt on the knitting machine is not engaged which means it is free to move. We use this Neutral setting to Position the Cursor on the Back Bed of the machine before aligning with the Cursor Indicator on the Selection Box.
When set at Neutral, when you slide the Cursor on the machine bed back and forth, it should move without any tension on it. Smoothly and easily.
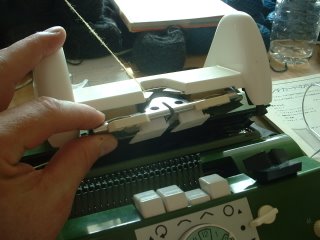
- Insert the Selection Box and the Drive Shaft into the opening on the right-hand underside of the knitting machine. . . .
 Tighten the two mounting screws and ensure the unit is flush with the machine. Be very careful not to drop the Selection Box!
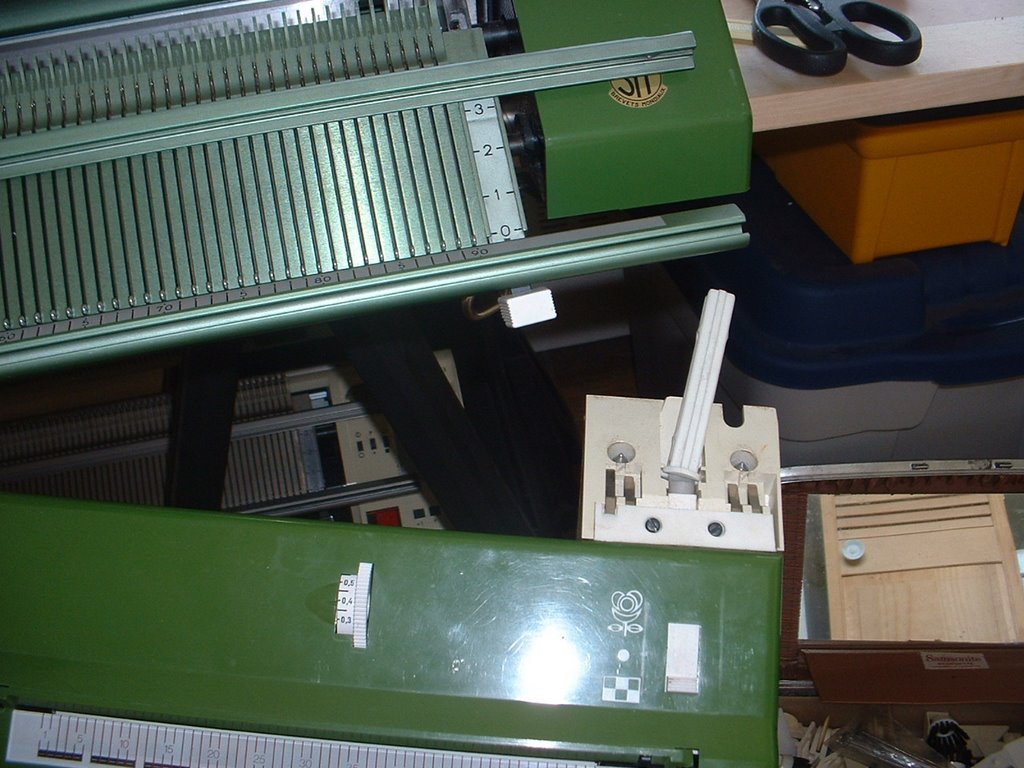
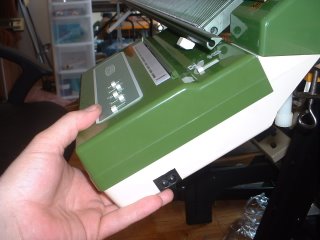 Attach the power cord and turn on the Selection Box by raising the far right switch on the control panel . . . .

- Note: you can perform the following steps with the Selection Box turned off BUT once the power is turned on, the small motors that control the movement off the Stitch Design Sheets are engaged and you need to ensure these are functioning.
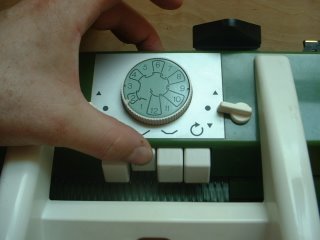
 Push the "Programme Changer" button down to the Geometric Setting; this is the lower position with the checker board graphic. This switch is rather stiff to move so you may have press on it firmly . . . .
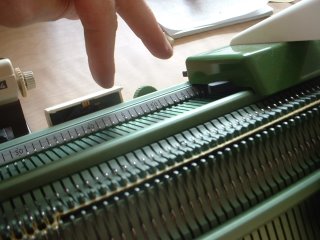
 NOTE: The reason for this stiffness is that in this lower position, the Selection Box Drive Shaft will engage the Cursor Belt on the underside of the Back Bed, to which the "Cursor" is attached. To test this connection, slide the cursor back and forth across the Back Bed. There should be a noticeable tension as you move the Cursor. If not, this indicates the machine is damaged in some way and it will not operate.
SET THE CURSOR
We need to align the Cursor Indicator on the Selection Box with the Cursor on the Back Needle Bed.
These two work in tandem and must be aligned before programming or the Selection Box will not scan properly! Now read the last two sentences again and burn them into your memory!
Step 1:
SET THE CURSOR INDICATOR AT NEEDLE #1 ON THE SELECTION BOX.
This is the Cursor Indicator on your machines Selection Box . . .

and you need to get one of two tiny little white squares to sit in the far left see-through window. . .

To do this you must slide the Cursor on the Back Bed of the knitting machine back and forth. . .

As you do this look at the front of your Selection Box. Look at the clear indicator window which has a scale numbered 1-60 just below the scanner light.
You should see 1 or 2 little white squares moving across this clear window as you move the Cursor on the back needle bed. This is the Cursor Indicator.

IT IS CRUCIAL TO MOVE ONE OF THOSE LITTLE WHITE SQUARES TO BOX NUMBER 1 ON THE FAR LEFT OF THE INDICATOR.
It should be visible where I am pointing as in the photo below. This represents needle number 1 of your stitch pattern.

SET THE PROGRAMME CHANGER TO NEUTRAL
• Slide the Programme Changer switch back to the middle position aligned with the dot symbol. The Cursor Indicator on the Selection Box is now locked in at Needle #1.
Step #3:
SET NEEDLE #1 ON THE BACK BED.
• The Selection Box needs to know which of the 180 needles on the back bed it should use to centre your Stitch Design.

Slide the machine Cursor across the Back Bed until it the centre of the Cursor is positioned directly over needle #1L.
This is the first needle to the Left of Centre "0" on the Needle Scale. This is the default setting for centring all stitches.
 |
| © Superba Knitting™ |

• Then slide the Cursor back to the far right, firmly up against the Cursor Stop.

VOILA!
YOUR CURSOR INDICATOR ON THE SELECTION BOX IS NOW ALIGNED WITH THE CURSOR ON THE BACK NEEDLE BED.
To Begin Knitting:
•The Carriage will be on the Right end of the machine. Make sure it is to the right of the Cursor Stop.
• Remember: Slide the Cursor to the far right along the Back Needle Bed and push it firmly up against the Cursor Stop. The Cursor must be locked into postion here before proceeding.

• Set your Carriage Stitch Keys for the desired Stitch Technique.

• If working Fair Isle or Jacquard stitches, insert and thread the Second Yarn Guide onto the Back Carriage.

• Set the Selection Box Switches as per your Instruction Manual to achieve various stitch effects.
• Set the appropriate Stitch Size for the yarn you are knitting with and for the Stitch Technique you are using.

• Insert a Geometric Mylar Programme Card into it's plastic cover and clip this into place.

• Insert the Programme Card into the horizontal opening on the Selection Box. It's close to the top edge of the Box, just above the Cursor Indicator.
• Turn the Card Guide Dial, on the right side of the Box, until the Programme Card is gripped by the internal wheels and starts to feed smoothly and level into the Selection Box.
Roll the card all the way down, until you almost reach the end of the card.
• Next, take the metal Programme Card Guide and attach this to the Selection box. Position this directly over the Programme Card slot.


This helps hold the Programme Card in position as it moves up and down in the unit.
• Now roll the Card back up and position it next to the stitch pattern you wish to knit. Use the first pattern for this test.

• Line up the Pattern Number you want to knit with. The pattern number is printed on the right hand column of the card in teeny tiny little numbers. I use - I kid you not - a magnifying glass to be able to see and read these.
In the photo below you can see the pattern #3 printed on the far right.
You will line this number up with a teeny-tiny white indicator at the far right of the opening.

• This is the white indicator I am talking about:
The little dash on the extreme right end of the opening where you insert you card. Just above and to the right of the Arrow printed on the box.
Here I show the card inserted. On the right column of the card are tiny numbers to denote the starting line of a stitch pattern. Line these numbers up with the white indicator.
WE ARE NOW READY TO KNIT.
ONCE THE PATTERN IS SET AND READY, GIVE TWO QUICK PULSES OF THE CARD ADVANCE SWITCH UPWARD. The Selection Box buzzer SHOULD go off, indicating you may begin knitting.
 Knit your first row and the buzzer will stop.
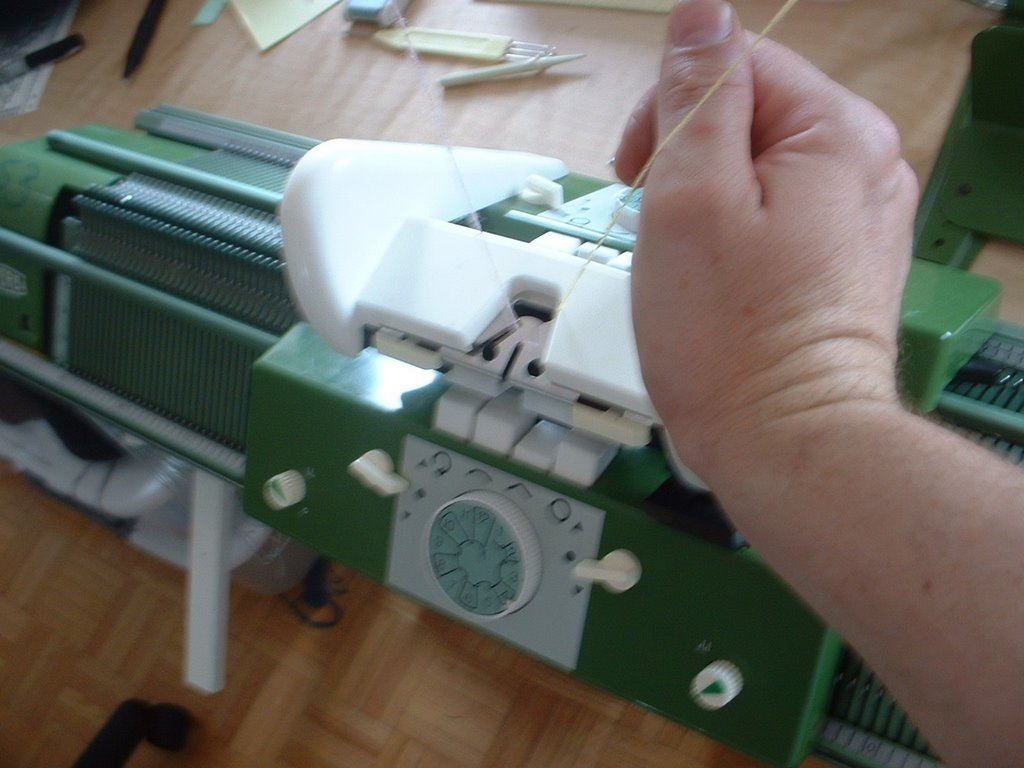
Continue knitting as per your project.
Note:
If the Selection Box does not buzz, pulse the switch again. Repeat if necessary.
OR realign your Mylar pattern with the white indicator and try again.
OR if the card continues to reverse and the motor won't stop turning and it comes out of the Selection Box, turn the box off and on again. Insert the card and try again.

NOTE: Some longer/larger stitch designs are marked to be knit once and then you will have to pause your knitting until the Selection Box motor has rewound the card back to line 1.
The Selection Box buzzer will buzz continuously cautioning you to stop knitting and wait until the card is back on row 1. Card 4, the Floral Design does this. Once the card has rewound back to row 1, it will buzz again until you knit the first row.
For All Stitch Techniques: Please refer to the stitch guide and instruction manual that came with your machine and set your Carriages and the Selection Box according to these instruction settings BEFORE you start knitting.


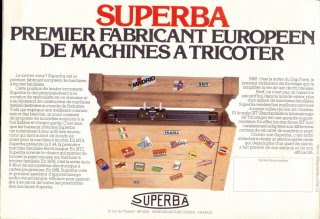
A Word About The Various Brands of French
Knitting Machines Produced by S.I.T./Groupe Superba
S.I.T./Groupe Superba of Mulhouse, France produced and marketed knitting machines world-wide under various brand names so this information applies to owners of home knitting machines with the following brand names and/or logos printed on their machines. To keep things simple I use the name Superba.Knitting Machines Produced by S.I.T./Groupe Superba
 ® The Superba brand was distributed all over the world and the model numbers include Superba S40, S46, S47, s48, System 624, System 9000.
 ® The White brand was distributed only in North America and includes model numbers 1402, 1502, 1602.
(** In North and South America, the Singer Company distributed home knitting machines produced by the Silver Reed Company of Japan - a completely different style of home knitting machine and operating system. The information provided here is for Singer machines made in France. If it doesn't look like the machines pictured here then you are in the wrong place!)
 ® Phildar is a French textile company which retailed S.I.T./Superba knitting machines in their Phildar Yarn Stores throughout France and Belgium. Models included the Phildarmatic D120, D140.
Patrick Madden
Toronto, Ontario CANADA
www.superbaknitting.com