These are known as the "A-Card" Stitches.
The various brand models include the Superba S48:
The Singer 2330 series, which come in many colours:
The White 1602 (sold only in North America):
The PhildarMatic (sold only in France + Belgium):
These are the simplest of patterns to produce because they utilize a 1x1 needle selection.
Different subtle stitch effects are created by changing the position of the switches on the control panel of the Selection Box, and by selecting various stitch keys.
Simple stitch patterns can be created for all Single Bed and Double Bed Stitch techniques your Light Scanning Model is capable of working.
The stitch techniques I used when working the A-Card Stitches are Single Bed Tuck, Slip and Weave Effect.
Learning to programme these 1x1 Stitch Patterns is a good way to learn the various stitch techniques your Light Scanning Model is capable of creating.
Also, sometimes when knitting, simple is best. It is one thing to be able to create large all over Jacquard and Fair Isle stitch patterns, but at the end of the day the question begs to be asked: Would you wear that?
The benefit of using such simple stitches is the subtle textures they create, especially when knitting Tuck and Slip Stitch.
These simple A-Card Stitches are perfect for turning a yarn that you may have bought and find to be too thin when knit up on it's own in Stocking Stich, into a lovely textured fabric, perfect for sweaters or a blanket simply by working the yarn in a denser 1x1 Slip Stitch effect.
I will show you in this tutorial how I used a fine Arcylic yarn as the "Ground Yarn" component for the Knit Weave technique. It worked perfectly, forming the frame work for weaving in all these left over balls of Black and Grey Yarns from hand knitting projects.
Setting Up The Machine For A-Card Stitches.
I'll begin by showing you how to attach the Selection Box.
The Light Scanning Selection Box, when not used should be stor
The Superba Light Scanning Selection Box model knitting machines can produce simple "every-other-needle" stitch patterns without having to insert a Programme Card. This ability is built into all S.I.T./Superba models with electronic needle selection.
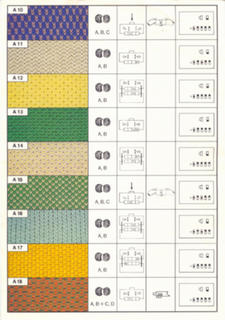
For the light scanning model these are known as the A-Card Stitches, and named thusly because the Stitch Patterns are listed A1 through A19.
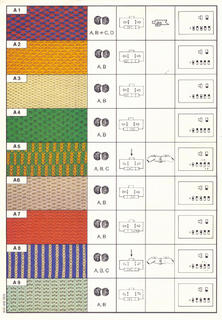 Following the instructions on the programming cards for yarn weight, carriage settings, accessories and Selection Box switch settings, you can achieve 18 various stitch techniques using the basic 1x1 needle arrangement, including Single Bed Fair Isle, Weave Technique, Jacquard and Double Bed Tuck. The photo below shows stitch pattern A7, which is a Single Bed Tuck Stitch knit in Clea Cotton. This is shown in the programming "HOW TO" below.
**For persons new to Superba Machines: remember that all electronic stitch patterning takes place on the Back Needle Bed. Not the front. **
I have selected 3 stitch patterns for a close-up view so you can see the differences in proramming and machine settings.
A1 is a Weave Technique stitch. How do I know? Because, if we read the legend from Left to Right, we have a smaple photo, next column is the Suggested Yarn Weight which lists 2 weights. Weave Technique knits with a finer "ground" or base yarn and a thicker yarn is woven between the stitches. Next to that is the schematic for the Carriage(s) and Settings which is only showing 1 carriage in use. If this was a stitch technique requiring a double bed model, such as A12, then you would see the symbol of two carriages and the appropriate Stitch Keys to select.

Next to the carriage setting is the accessory information: in this case Weaving Brushes. That is the giveaway right there. Finally on the far right we have the Selection Box setting switches.
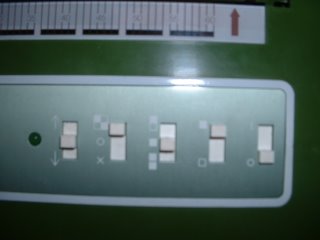
**A simple way to quickly remember the settings (you see this in old knitting magazines) is that there are 5 swithces, 4 with three positions. So the setting for A1 is "Centre-Up-Centre-Up-Up".**
The next photos show A2, which is a Slip stitch knit on the Single Bed or Back Bed and A5 is a Single Bed Fair Isle technique. The complete cards are below with copies of all 18 stitch settings .


SMART MOVE...
Quick Programming the Selection Box using these stitches is is a handy way to test new yarn to see how it knits up on the single and double beds without having to insert and program a mylar Programme Card.
Also, if the yarn you have is on the thin side but you still want to knit with it, I suggest using stitch patterns A2 and A3 which are single bed Slip Stitch techniques and A4, single bed Tuck stitch. These will bulk up your fabric nicely, and depending on the stitch size. produce some interesting fabric densities.
HOW TO INSTRUCTIONS....
Read my instructions first as the steps for programming the Selection Box for A-CARD stitches vary slightly from using the Programme Cards.
Then thread up your machine and try them all, in order, and keep these samples in a binder with the A-Card. This way you will have a reference for what kind of fabric each produces. This is a very good way to introduce yourself to the various stitch techniques a Superba can produce.
FIRST....
My example in these instructions uses stitch pattern A7, which is a Single Bed Tuck Stitch. The carriage is set with both the Tuck and Circular keys selected. I used Clea Cotton for this sample which is a 4-ply (gauge of 28-30 stitches/4") hand knitting and crochet cotton.
Before connecting to a power source make sure the back bed carriage is at the right hand side. Next you want to select a number of needles to knit with; ie. 40. So push 20 needles to the left of centre "0" on the graduated scale and 20 to the right to position No.1.
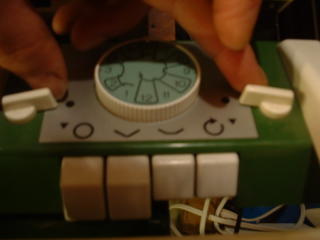
Please set the Selection Box switches to the following positions:
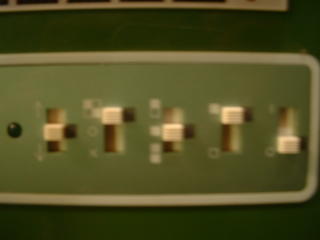
Various settings of these Selection Box switches will produce different effects: For A7, the switch settings are "Centre-Up-Centre-Up" - and "Down" for now, simply because the far right switch is the On/Off switch and we have not turned the box on.
Set the Programme Changer to the lower position - the Geometric setting. By doing so before the power is turned on indicates to the Microcontroller that no Mylar stich pattern sheet will be used and it will automatically charge the needle bed for a basic Geometric Programme using a 1x1 needle selection.
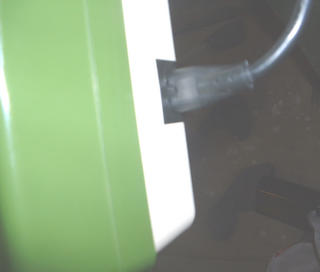
Next you can plug the Selection Box into a power source. I suggest you connect it to an extension cord with a power surge protector built in to protect the electronics.
Then switch on the Selection Box by moving the switch on the far right to it's upper position. You will see the Light Scanner light up and the Selection Box will issue a beep.
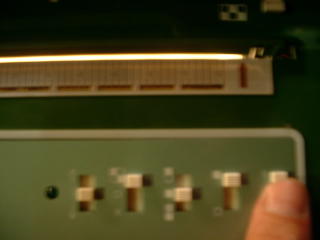
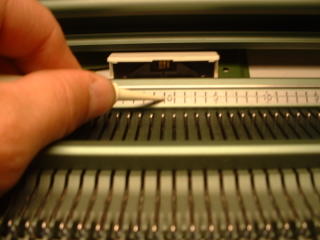
You then want to start sliding the Cursor on the back bed of the knitting machine and as you move the Cursor on the machine . . .
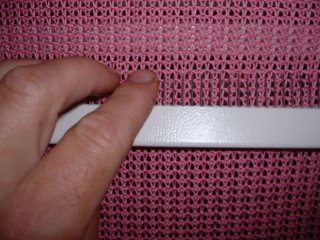
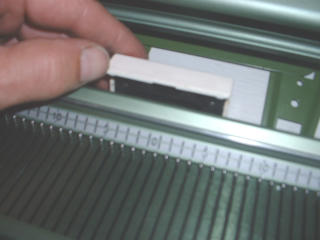 the Cursor Indicator on the Selection Box should be moving at the same time. You want the White Reference Mark to be in the first square on the left-hand side on the indicator.
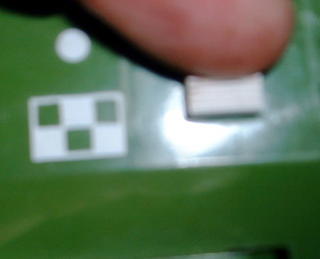
 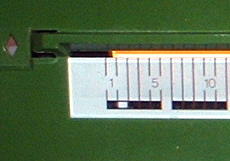 The photo above captures a picture of the Cursor Reference Mark - it is the white square, the photo below indicates it should be all the way to the left in the first square. This aligns the Selection Box Cursor Indicator with the Cursor on the back needle bed.
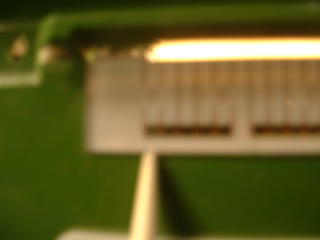
Next we switch the Programme Changer to neutral position. This locks the Selection Box Cursor into position.
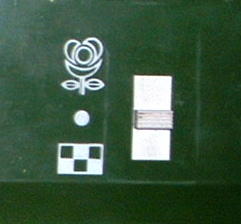 Now we need to tell the Selection Box which is the first needle or starting point of our stitch pattern. For Superba machines the default is always Needle No. 1 to the left of centre "0".
So bring the centre of the Cursor on the back bed directly opposite the first needle to the left of centre "0" on the graduated scale.
Now set the Programme Changer back to the Geometric or lower setting.

Finally, bring the Cursor on the back bed to the same side as the carriage and lock it into place.
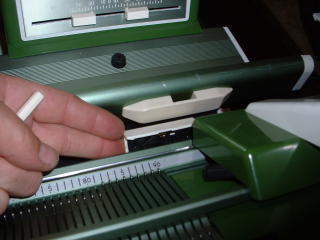
On your back knitting carriage select the Tuck & Cirular Key together, thread the carriage and commence knitting your sample or garment.
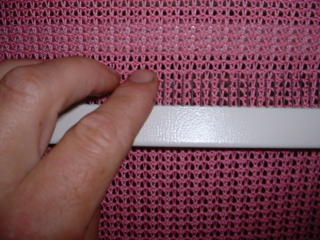
Tuck & Circular stitches knitting cams selected together produce the fabric shown below.
SELECTION BOX NOT SCANNING?
If your Selection Box is damaged and will not scan a Mylar Programme Card, there may be a good chance that it will still knit these most basic of A-CARD stitches. Try it out. You don't need to thread the machine to test it. Simply follow the programming steps and pass the carriage back and forth across the selected needles and watch to see that every-other-needle is being selected row by row. If they do then you are in luck.
Patrick Madden.
Toronto, Ontario CANADA


