

Greetings and Welcome to Superba Knitting™.

In this post I show you how to inspect and replace any broken or damaged needles on your Double Bed model and Hobby Knitter model of SUPERBA, SINGER, PHILDAR and WHITE brand Knitting Machine.

First, some basic information regarding the particular Brand Name of machine you may own...
 S.I.T./Groupe Superba of Mulhouse, France produced and marketed knitting machines worldwide under various brand names, so the information posted here applies to owners of home knitting machines that have the following names and/or logos printed on their machines:
 ® The SUPERBA brand was distributed in Europe, Africa, Asia, Australia and North America and machine model numbers include the S40, S46, S47, S48, System 624, System 9000.
  ® The WHITE brand was distributed only in North America and includes model numbers 1402, 1502, 1602.
 **Note: In North and South America, the Singer Company distributed home knitting machines produced by the Silver Reed Company of Japan - a completely different style and format of knitting machine.
 ® Phildar is a French textile company which retailed S.I.T./Superba knitting machines in their freestanding Phildar Yarn Stores throughout France and Belgium. Models included the Phildarmatic D120, D115 and D110.
  |
| SUPERBA S9 Hobby Knitting Machine Model. |
It does not matter what colour your machine is, how old or what model you have. This information pertains to all French Double Bed knitting machines made in Mulhouse, France as they all use the same style of Latch Hook Needle.
 |
| SINGER MT610 Machine á Tricoter. |
SUPERBA Latch Hook Needles
Your Superba knitting machine Latch Hook Needles are made from hardened steel and are quite durable.

CAUTION: Be mindful of the sharp hooks on the ends of the needles.

They can cause serious harm and a knitting machine should not be left uncovered around small children or pets.

They can cause serious harm and a knitting machine should not be left uncovered around small children or pets.
 The Needles are comprised of three sections: the LATCH, the HOOK, and the HEEL. Learn these names as you will be interacting with them often.
Note the size difference between the 5mm Gauge and 9mm Bulky Gauge Needles in the following photo:

5mm Gauge Latch Hook needles are 84mm in length compared with the larger 9mm Gauge needles, which are 109mm long.

A Superba Double Bed Knitting Machine has 180 latch hook needles embedded in each aluminum frame known as a Needle Bed.

Along the length of each needle bed, the needles are spaced 5mm apart and housed in individual Needle Channels.

At the edge of each of these channels, across the width of the Needle Bed are rows of metal protrusions called Flow Combs.

When our needles are in working position the Flow Combs act as a dividing line between each needle or stitch.


Furthermore, they are crucial to the formation of stitches as your machine uses the Flow Combs as a leverage in forming stitches ...

The individual Stitch Sizes our machines can create are formed in part by the Flow Combs...

This spacing of the needles defines the overall "Gauge" of your machine - 5mm Gauge for Double Bed Models & 9mm Gauge for Bulky Hobby Models. This "gauge" is an indicator of the weights of yarns each model of machine may knit with and the range of fabric it can produce.

The needles on your machine travel at very high speeds and to help minimize friction while moving back and forth in their channels, the needles are held in place by two discreet parts:
• The Retaining Wire
• The Retaining Spring.

The Retaining Wire and Spring work in tandem to provide a light tension on the needles, so they will slide back and forth without causing too much friction, and ensure that they will stay in certain positions on your needle beds without moving on their own.
 |
| SUPERBA Retaining Spring Used On Both 5mm & 9mm Gauge Models. |
IMPORTANT NOTE: If the Needle you are removing has a bent Hook or warped Latch that does not close fully, you must cut off the Latch Hook before removing that needle. Otherwise the Needle Hook can snag on the hidden Retaining Spring, damaging it and you will have to replace this.
 |
| Retaining Spring Embedded In a 9mm Model Machine. |
If you want to remove Needles simply to clean a dirty machine bed and then replace them, you must ensure that the Latches are closed over the Hook.

Latch Hook Needles can become damaged or worn with use and you must monitor their condition at all times.
A bent or damaged needle is a major reason why a machine will not form stitches correctly. Check your needles often! It takes just a moment to do. Let me show you how.
A Note About Deep Cleaning Machines
There has been discussion on Ravelry and other machine knitting groups by members who have bought or found machines where the needles are fused in place by rust and lack of use to the Needle Channels.
It is possible to remove these needles, but there is no guarantee the Anodized Aluminum beds will withstand the process. You have to use your judgment as to whether the process is worth the effort. I've listed some notes on deep cleaning your machine at the end of this post.
REPLACING A LATCH HOOK NEEDLE.
Ok - Let me show you how to change a needle!
I'll start with the 5mm Gauge Machines first, followed by instructions for changing needles on the Bulky 9mm Hobby Machines.
In this tutorial I am working on a SINGER System 624 Double Bed Model, a WHITE 1502 Double Bed Model and a WHITE S9 Bulky Hobby Model Knitting Machine.
I'll start with the 5mm Gauge Machines first, followed by instructions for changing needles on the Bulky 9mm Hobby Machines.
In this tutorial I am working on a SINGER System 624 Double Bed Model, a WHITE 1502 Double Bed Model and a WHITE S9 Bulky Hobby Model Knitting Machine.

Step #1: Inspect The Needles
Before starting to work on a project I take a moment to inspect the needles on my machine bed.
You don't have to remove the carriages, as you may need to replace a needle while you are in the middle of working on a project and have live stitches on the machine.
I just slide the carriages out of the way to the right end of the needle bed.

Working on one needle bed at a time, raise all the needles to Upper Working Position no.3, which is the highest position on the needle bed. Use your Needle Ruler to do this. It makes the job quick.

Now hold the Needle Ruler against the Latches, closing them against the Hooks.


You will be able to see any distortions in the needles, mainly bent Hooks or bent Latches.

It pays to take the time to do this. Use your finger tips to open and close the latches. They will detect defective needles than may go unnoticed with just a visual inspection.

Needles that are bent or where the Latches are stiff and won't open and close easily inhibit the performance of you machine to properly form stitches.

They also inhibit accessories like the Garter Transfer Carriage to operate properly because the needles won't open/close or align.

If you notice any Latches that are stiff and will not close easily, leave these in Upper Working Position. Lower all other needles not in need of replacing.
Before starting to work on a project I take a moment to inspect the needles on my machine bed.
You don't have to remove the carriages, as you may need to replace a needle while you are in the middle of working on a project and have live stitches on the machine.
I just slide the carriages out of the way to the right end of the needle bed.

Working on one needle bed at a time, raise all the needles to Upper Working Position no.3, which is the highest position on the needle bed. Use your Needle Ruler to do this. It makes the job quick.

Now hold the Needle Ruler against the Latches, closing them against the Hooks.


You will be able to see any distortions in the needles, mainly bent Hooks or bent Latches.


They also inhibit accessories like the Garter Transfer Carriage to operate properly because the needles won't open/close or align.

If you notice any Latches that are stiff and will not close easily, leave these in Upper Working Position. Lower all other needles not in need of replacing.
Please remember that it is possible to replace a broken needle while in the middle of knitting a garment.
Important!!!
How To Remove Needles With Bent
Hooks or Latches:
How To Remove Needles With Bent
Hooks or Latches:
If the Needle you are removing has a bent Hook or warped Latch that does not close fully, you must cut off the Latch Hook before removing that needle.

Why? The Needle Hook can snag on the hidden Retaining Spring, locate under the Upper Slide Rail on the machine bed, damaging the spring and you will have to replace this, which is not a straight forward procedure.
This is the major difference between the way the needles are embedded on a Superba vs. Japanese machines like Silver Reed and Brother.
You will need a pair of pliers or metal cutting snips that will cut metal the thickness of your knitting machine needles. These needles are made of hardened steel, so they take a bit of strength to cut.
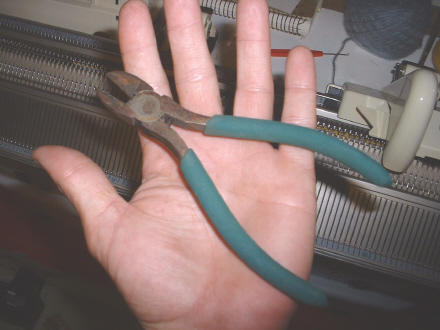
Caution! Make sure you wear protective goggles as the small metal parts you are about to cut off can easily hit you in the eyes! Trust me on this! I had a latch go into my right eye and I was lucky it didn't do anything beyond hurting like hell!
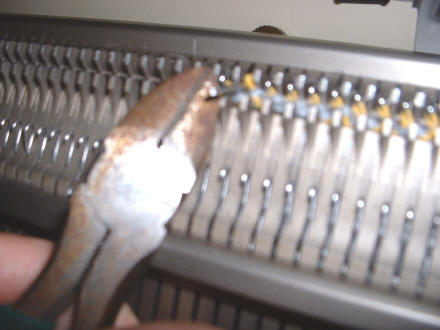
You want to make the cut just behind the Latch on the needle.
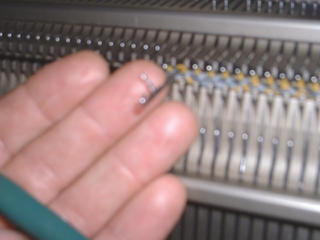
Place the snips just behind the Latch of the needle and make a clean, quick cut.
The idea is that nothing remains on the end of the needle to catch on the hidden Retaining Spring under the needle bed.
If you want to remove Needles simply to clean a dirty machine bed and then replace them, you must ensure that the Latches are closed over the Hook so the Hook does not snag on the hidden retaining spring.
But before you remove the needle you have to remove the Retaining Bar. Here's how:

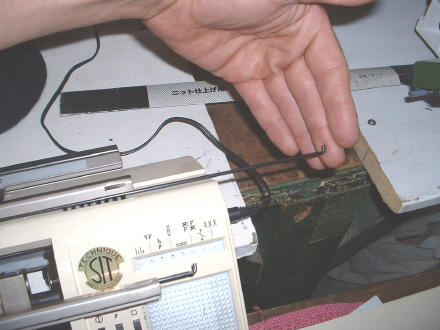
Step #2: Remove Needle Retaining Bar
In the photo above you can see how it is tucked itself around the edge of the machine frame. This is the Retaining Bar.

It looks like an Alan Key sitting at the edge of the rail. Insert your Dental Pick Tool into this corner and pull it to the right.

This applies to both the Front and Back Needle Beds.

Then you can grip the Retaining Wire and slide it out to the right.
Note: When you have done this a few times, you won't need to slide the wire out all the way, as you will know how far to remove the wire in order to release it's grip on the needle you wish to remove.
The needles on a Superba won't pop up like those on Japanese brand knitting machines, so don't worry about dropping a stitch or having to reposition a large number of needles. That doesn't happen when you remove this Retaining Wire.

If it's just one needle to remove, slide the Retaining Wire out until you think it has cleared the needle you want to remove.

You will check to see if the Retaining Wire has cleared the needle by tugging on the Heel of the Needle. If you can raise the Heel up, you know you are clear. But there's one more thing to do!


You must ensure that the Latches are closed over the Hook before you remove the needle. Use your finger to do this.

Step #3: Remove the Damaged Needle
Once the Retaining Wire is removed and you've ensured the latch is closed, grasp the needle by the Heel and raise the back end of the needle.

Then slowly remove the needle by pulling backwards and upwards as you reach the back of the needle bed.


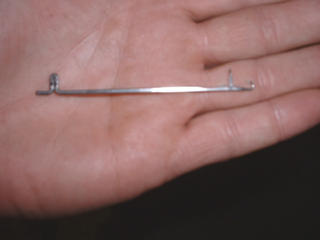
If you had to clip a damaged needle, this is what the clipped needle will look like. Dispose and replace with a new needle.

Step #4: Insert A New or Cleaned Needle
Take a new or cleaned needle and make you reverse the process, including making sure the Latch is open and laying flat before inserting into the needle channel.

Insert new needle into the needle channel, keeping the Heel raised and slide the needle through to the front of the machine.

Insert new needle into the needle channel, keeping the Heel raised and slide the needle through to the front of the machine.


Then return the needle back to the lowest position on your needle bed. If you are doing this in the middle of knitting a garment, just return the needle to Working Position no.1.
Step #5: Replace The Retaining Bar
Now you can slide the Needle Retaing Bar(s) back into position flush with the side of the needle bed.


The way these machines are engineered it's hard to get this process wrong.
There is no sponge bar to deal with that deteriorates and you can raise and lower the needles using a Needle Ruler and see they are firmly in place.

Tip: If you had to clip the Hook off a needle using pliers, inspect your Back and Front Needle Beds to ensure that no small metal pieces from cutting off the latch hook have fallen onto it.
Voila! A needle is replaced.
Don't Be Stingy! Check your needles often and change them. They do not last for ever.

How To Change Needles On
S9 Hobby Knitter Models:

1. Identify the needle that needs to be replaced and move it all the way forward on the needle bed.

2. Locate and remove the Needle Retaining Bar which is located at the right end of the machine, usually tucked right up to the white plastic Flow Combs.


3. Pull the Retaining Bar out as far as necessary to release the Latch Hook Needle.

4. Make sure the Latch on the needle is closed over the Hook, so it won't catch on the Retaining Spring hidden underneath.


If you notice the Latch is open when removing the needle, STOP! and push the needle back in, close the latch over the hook, then try removing.

I had to use a pair of Needle Nose pliers to get a needle out due to this problem, and it damaged the Retaining Wire.

6. Take your replacement 9mm Needle (which are 109mm long) and reverse the process to insert.

IMPORTANT! Make sure the Latch is open, not covering the Hook. You won't be able to insert the needle with the Latch closed.
7. Slide the new needle all the way forward, then slide it all the way back to Non-Working Position.

8. Replace the Retaining Bar and you can continue knitting.

Tips On Deep Cleaning Your
SUPERBA Knitting Machine
If you have a new machine or have unpacked one after years of neglect, it is best to remove all the needles to be soaked in mineral spirits and to vacuum and remove any dust and lint that has clogged the needle channels.

I suggest you try using Denatured Alcohol. It’s not as corrosive to the Anodized Aluminum, which the Superba needle beds are made of.
• Take the machine outside, place on a table covered with an old sheet, to collect any alcohol that would drip down.
• All pets, kids, out of the way please.
• Have ready a container filled with Denatured Alcohol to soak any needles you do remove and are salvageable in.
• Have a bunch of rags, cut up old T-shirts work great for wiping down the needle bed as you work.
• Have the machine clamps, if available, ready so you can clamp it to the table to stabilize it during the process.
• Remove the Needle Retaining Bar and try to remove the needles, soaking those you feel would be salvageable.
• Any needles with bent latches or hooks, you must clip the latch/hook off with metal cutting snips. Otherwise, as you may already know, you chance snagging the Retaining Wire that is under the Upper Slide Rail. There is one on each needle bed.
• Begin by saturating the needle beds with the alcohol, using either a sponge or paint brush to work the alcohol into the needle channels.
See if you can get the needles to move. A pair of Needle Nose pliers would be of help, to grip and tug on the Needle Butts.
• Removing the bottom rail will also help with removing any stubborn needles.
If you have an Allen Key set, you can lay the machine on one needle bed, to expose the bottom of the machine. Along the bottom rail, you will see 5 tiny screws. These are black in colour. If you remove these, you will then be able to slide the bottom rail off to expose and clean the needle channels. Just make sure you have a container ready to place the tiny screws in, so you don’t misplace them.
• A ShopVac is handy if you have a crevice attachment for it, to assist with vacuuming up any loose lint and grime.
• With all the needles removed, clean the channels with another coating and scrubbing using the Denatured Alcohol. Use one of your transfer tools or a skewer for grilling meat, covered with one of the rags, dipped in the alcohol, and scrub those needle channels clean.

• Soak any needles you feel may come through the cleaning process. Wipe them dry after soaking for a few hours. I would wipe them down lightly with a rag saturated with a bit of clean machine oil before inserting back into the Needle Channels.
• Replace the bottom rail. Put the needles that pass your inspection back onto the machine, working from Centre “0” outward. Then replace the Needle Retaining Wire.
If this does not help and the needles remain fused in place, then unfortunately you may have to admit that this particular machine is beyond being salvageable. Hard to do but neglect does take it’s toll sometimes. I’m not saying don’t try, but be realistic as to what you can accomplish.
I hope you find this information helpful. For more knitting machine help and assistance, join the Superba Knitting Group on Ravelry: A Knitting and Crochet Community.
Patrick Madden.
www.superbaknitting.com